The tab Favourites is meant for storing session
elements that you would like to re-use in new sessions, such as actors, language elements, locations etc. Elements that can be saved in
Favourites are: IMDI sessions (![]() ), actors,
content elements, etc. When taken to the favorites tab, such elements are placed in their
corresponding subcategories; i.e. if you drag an actor, this will be automatically located
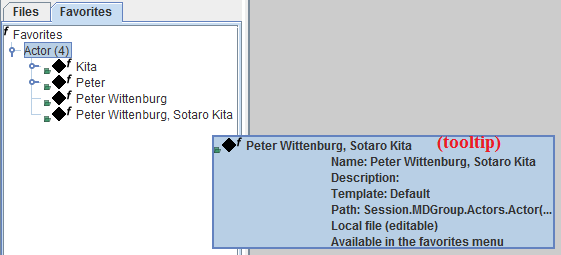
under the category "Actor". If you have a number of elements in your Favourite List and you
are not certain what the content of a given element is, you can always place the cursor over
it and wait for the tool tip (information window) to appear (see figure below).
), actors,
content elements, etc. When taken to the favorites tab, such elements are placed in their
corresponding subcategories; i.e. if you drag an actor, this will be automatically located
under the category "Actor". If you have a number of elements in your Favourite List and you
are not certain what the content of a given element is, you can always place the cursor over
it and wait for the tool tip (information window) to appear (see figure below).
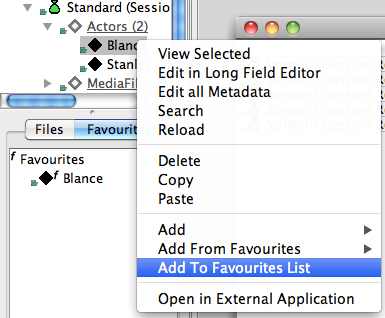
In order to add an element from the local corpus to the Favourites List, right click its node and choose Add to Favourites List. The element will appear in the Favourites List. You can also just drag and drop it from the corpus tree structure, right down to the Favourites List. If this element is needed again, you can place it into a preferable location in your Local Corpus either by dragging and dropping it from the Favourites list or by copying and pasting it in one of the Local Corpus (sub)branches.
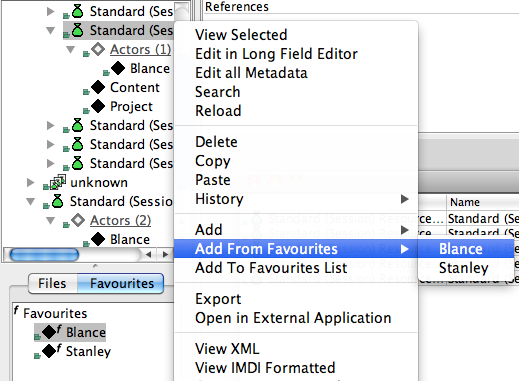
Once you have completed your Favourites list, you can start using it. Let's say you want to add a particular Actor to a session in your Local Corpus: in order to do so choose the session in question, right click it, select Add from Favourites and click on the desired actor. Otherwise, you can simply drag and drop the actor from the Favorites tab to session in the Local Corpus.
Note that the items in the Favourite List can be viewed and edited in the same way as the elements of the Local Corpus (i.e. via the options of the right click context menu). This means that if you make changes to your favourites you will have to right click on them and select Save Changes to Disk to make them permanent (or use Ctrl/cmd+S). The favourites which have been edited turn blue, which indicates that they contain pending changes to be saved locally.
Favorites can also be exported and/or (re)imported. In order to export your favorites: right click on Favorites (in the Favorites tab) and select Import/Export Favorites. A window like the one in the figure below will appear. Select the favorites you want to export, then Export selection, and after having chosen the location where to export select Save. As soon as the export process is complete you will see a message confirming it and the folder containing the exported files will open.
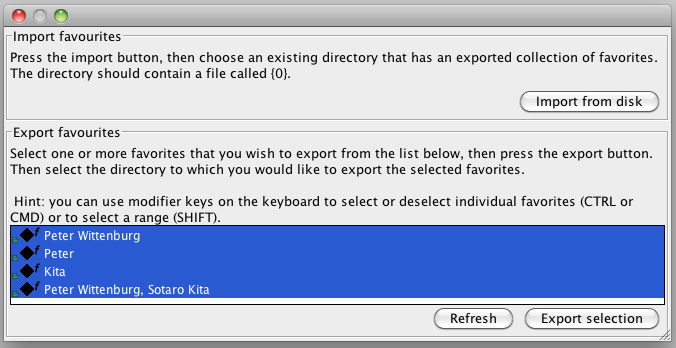
As you can see from the image above, if you want to import some favorites into Arbil you have to follow the same instructions as the ones explained for the export: right clich on favorites > select Import/Export Favorites. This time, though, choose Import from dick. Choose the (.config) file that you want to import and select Open. You will see a message confirming the successful import, while in the Favorites tab you will see the just imported files.