Sometimes one has two or more video files of the same recorded scene, e.g. when 2 different cameras were used. In that case it may happen that both recordings don’t start exactly at the same moment. In order to fix this, one should synchronize the videos. Synchronizing is the process of working out the gap (offset) between the start times. When played together, the start point of the earlier source is shifted forwards to this offset. This can be done in two different ways:
- If you know the amount of offset for a video, you can enter it by activating the Linked Files dialog window (via
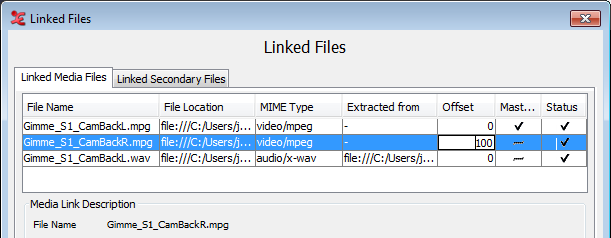
Double-click the offset time for the video you want to alter and enter it in
milliseconds. Click to save.
- If you do not know the offset time, please follow these steps to synchronize your videos:
Open a new document with 2 (or more) video files by selecting both files in the New Transcription dialog window (as seen above).
Select the pull down menu .
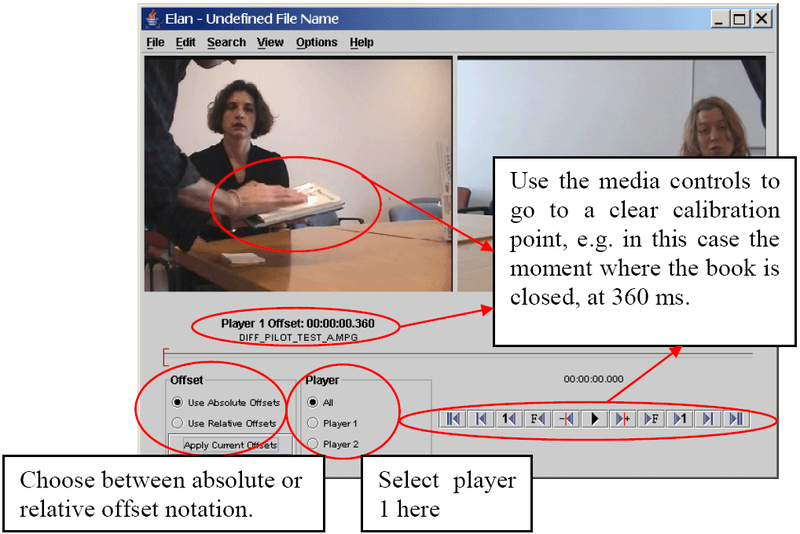
Make a choice about how the time codes should be displayed:
Absolute Offsets: for every video its own timing is being shown.
Relative Offsets: the video of player 1 is appointed to be the “master”, i.e. the time position of the other videos will be determined as starting point of this file, which starts at 00:00:00.000.
Select the radio button . You can now choose a moment in the video which is easy to calibrate (some clear anchor point, in both of the videos). For instructions how to navigate through the video file, see Section 1.6.
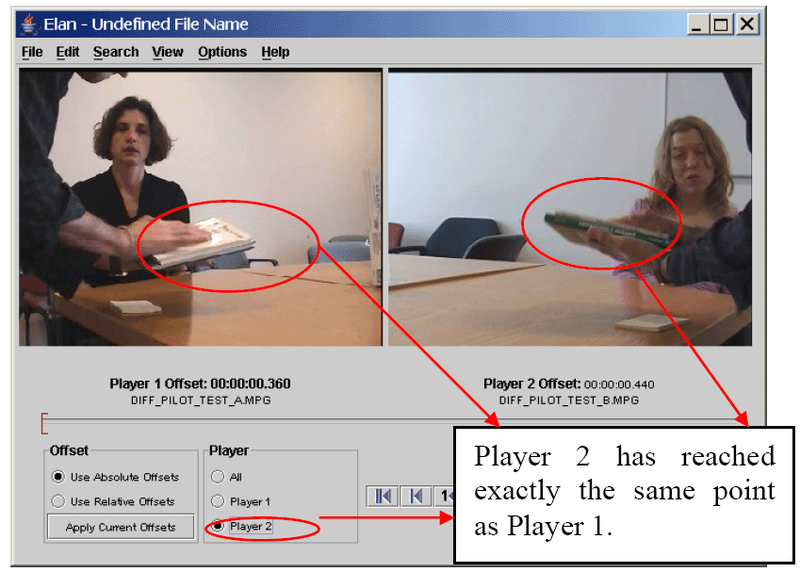
Now select and go to the same calibration point.
![[Note]](images/note.png)
Note See Section 1.2.14 for changing the order of the videos, i.e. the order of appearing in Player 1, Player 2, etc.
Finally, choose . By selecting the play button both videos will be played together now, so you can check if the synchronization between them is correct. If not, please repeat step 3-5 until the result is satisfactory.
Leave the synchronization mode by selecting . Now you are ready to start entering annotations.
By double clicking on a video, it will be placed in the leftmost video window (which is also the biggest one in case there are 3 videos).
Note If you changed the media file synchronization of a file that already is annotated, you might want to move the annotation units all together to the right (later, positive value) or to the left (earlier, negative value) on the time axis. This can be done using the menu (see also Section 2.8.9):
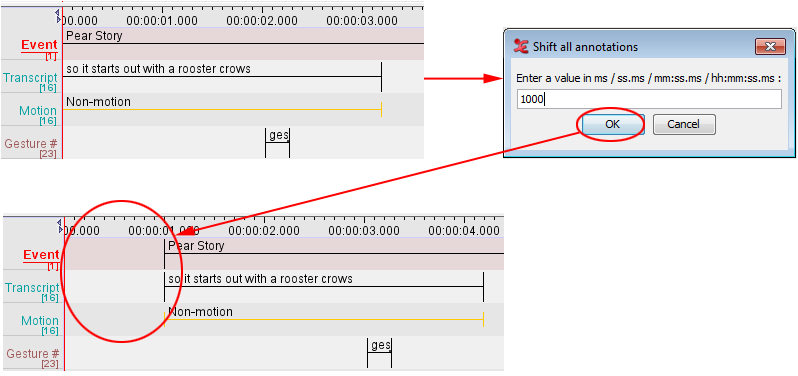
This process won't delete any annotation. If the annotations are shifted to the left, the maximum shift will be restricted by the leftmost annotation unit.