If you want to perform a detailed search over multiple annotation files in different formats (including: EAF, SHOEBOX, TOOLBOX, CHAT, SUBRIP and TEXTGRID) you can use the content search function. This allows you to restrict the search to certain tiers (i.e. the different layers present in a hierarchy-structured annotation file), to use regular expressions, etc., while examining multiple annotation files at once.
To include multiple files in the search domain, select one or more nodes in the tree-view of the by clicking on the nodes while holding down the CTRL key on the keyboard. If you click on the button , you will include all annotation files under the selected corpus nodes in the search domain. Alternatively, you can select a parent node, in which case all the child nodes will be included in the search.
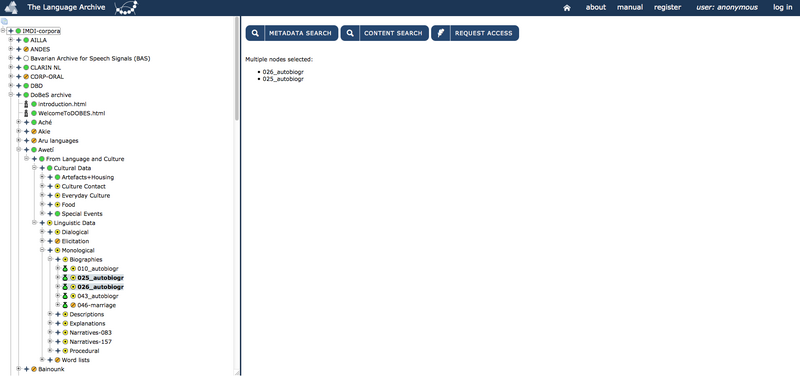
A new browser frame for the search engine will appear with the search domain displayed at the top of each of the three search tabs:

The voice Domain shows the name of the selected node(s) in the archive, whereas Types shows all the types of annotation files in the domain of that /those node(s). You can include or exclude types of annotation files in the search by respectively checking or unchecking them. Remember that, in order to be able to see the various annotation files, you have to log in first.
It is possible that you are not allowed to read files from certain parts of the domain due to (http://tla.mpi.nl/tools/tla-tools/ams/). In that case all searchable files from those parts are excluded from the annotation content search. As a result, the search domain contains fewer files.
Please remember that even if you have received access to the resources through AMS, it could take up to one day for the changes to be recognised by TROVA as well.
As can be seen from figure 1.2 above, there are three tabs offering different kinds of search:
: it finds all annotations in which the search string occurs.
: it finds all annotations or N-grams (i.e. search strings of more than one word, either consecutive or not) in which either the search string or the regular expression occurs, both case sensitive and insensitive and possibly restricted to one (type of) tier.
: it finds annotations within one single tier but also in three related tiers at the same time. You can use multiple search strings or regular expressions and make constraints on duration and time slot as well as constraints on how the search strings are to be combined.
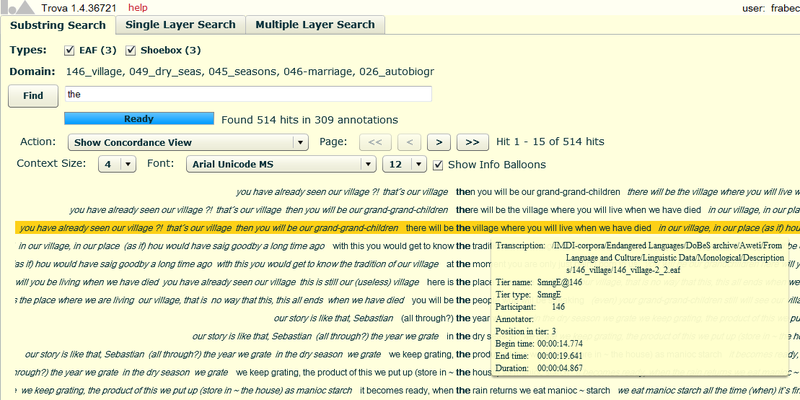
This tab offers the simplest search. It just asks for a search string. After entering the search string you can click on (or press Enter) to start the search process. This will result in a page like the one below:
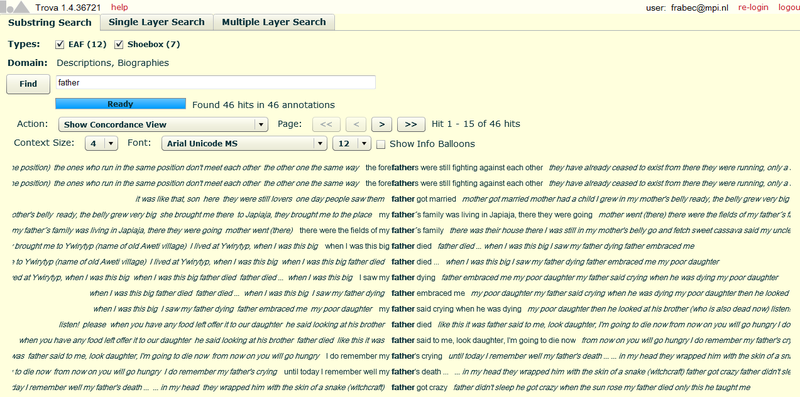
The result page above shows the annotations containing the search string plus some annotations in the context printed in italic. The default number of annotations in the context is four on both sides, but you can change it through the Context size menu. When the number of hits exceeds the maximum number the window can contain, you can view the rest of the hits by clicking the and > buttons that appear above the list of hits. Besides the ones just described, there are other options you can choose from.
From the Action menu you can select:
1) Show Concordance View: it is the default mode in which results are shown. The search strings is in bold and has some context on both sides.
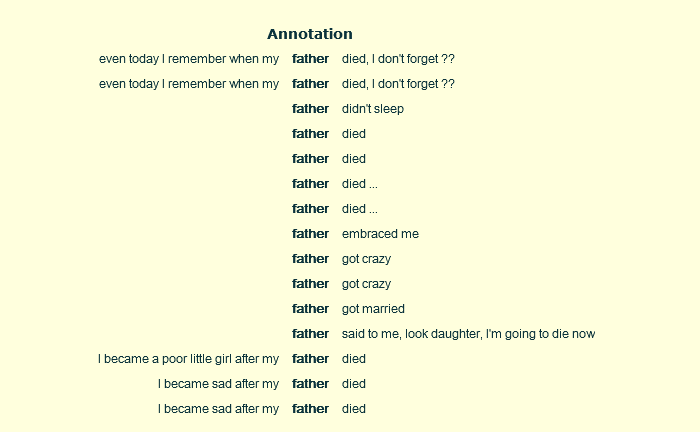
2) Show Frequency View Sorted by Annotation: the results are shown in the right bottom half of the page in alphabetical order (see the first word of the annotation).
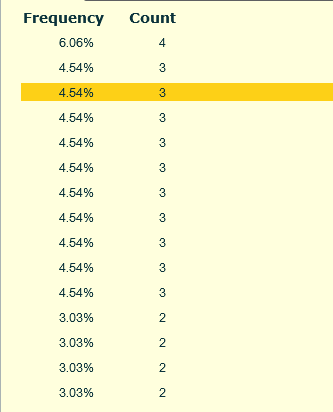
3) Show Frequency View Sorted by Frequency: the results are shown in the left, bottom half of the page, under percentage form, in a decreasing order.
4) Show Selected Hit in Transcription: as the name says, first of all select one of the results, and then select the option itself (otherwise simply double click the result you need). You will be redirected to Annex interface, where you will see the annotation in the Timeline viewer [see section 2.2.1. of Annex manual; use the following link: http://www.mpi.nl/corpus/html/annex/ch02s02s01.html].
5) Show Selected Hit in Corpus Tree: like with option 4), first select the result you need, and then this option. You will be redirected to the IMDI browser interface, where you will see: a) the resource to which the annotation belongs highlighted in grey in the IMDI tree; b) some information about such resource in the main content panel.
6) Save Hits: this option allows you to save the results you have obtained from your query. Once selected, it will open a dialogue window asking you to choose: a) the export format (either UTF-8 or UTF-16); b) the fields to export (e.g. begin and end time, tier type and name, etc.).
![[Note]](images/note.png) | Note |
|---|---|
If you are in doubt about which one to choose between UTF-8 and UTF-16 because you are not very familiar with character encoding, opt for UTF-8. |
Moreover, below the Action drop-down menu, you can find a Font menu, which allows you to choose the style of writing and the size in which the results will be shown.
Finally, the option Show Info Balloons, which is displayed on the right of the Font menu, allows you to see some additional information about the annotations you have searched for. If you check this option, and then place the mouse cursor on one of the results, you will see a yellow balloon appearing, containing some information about that result, like for example the transcription link, the tier name and type, the begin and end time, etc. See figure 1.4. below.
| Note |
|---|---|
All the features seen above, related to the Substring Search, are also present (with the same functions) in the Single Layer Search and in the Multiple Layer Search. |