When you want to make changes to a large amount of IMDI files, editing one after the other might be a bit awkward. Therefore the IMDI tools provide a system that supports the automatic modification of groups of imdi files. This works as follows:
The user creates a so called update stylesheet, using the IMDI editor. This file contains a description of the desired changes. (See section 1.2.3.4 in the IMDI editor manual, Create Update StyleSheet)
With the IMDI browser you can apply the changes as described in the stylesheet to a set of files.
![[Note]](images/note.png) | Note |
|---|---|
If you want to change a large amount of files, be sure to test your stylesheet on a smaller set in advance. Otherwise a small mistake might corrupt many files. |
A stylesheet made with the IMDI editor can be activated by following these steps:
Select the menu and make sure this option is enabled.
Make a selection:
Select a single IMDI file or a corpus node through .
Note If you select a corpus node, all child nodes will be affected!
Note A corpus node can only be used if there exists an associated search database (i.e., the C icon should have a black background). To create a search database, see Section 3.1.2)
Or type in a directory path in the Root URL text field and press enter, e.g. d:\tmp. In this case the stylesheet will be applied to all imdi files found in this directory.

Figure 4.1. Entering a root url
Enter a directory name and press Enter.
Now the contents of that directory will be displayed.
Right click on the root node and select Sessions Modification
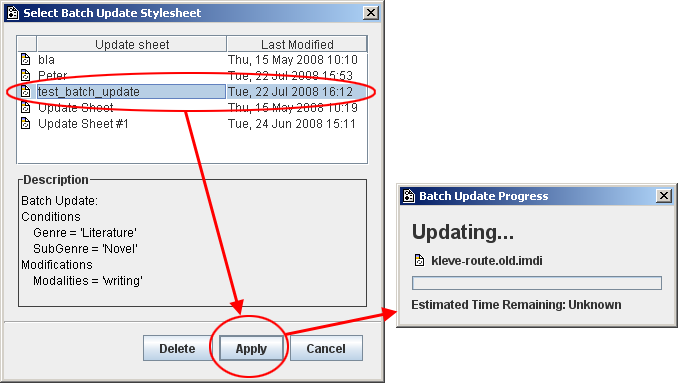
Right click on it and select
Select the stylesheet you want to use and click on
Now the desired changes will be made to the selected file(s).
Note that for all of the files to which the update stylesheet is applied a backup file (without the alterations) is created with the extension .old.1 (and .old.2 after another update, etc.).