After the user has created a new workspace, or has selected an existing one, the following page will be displayed:
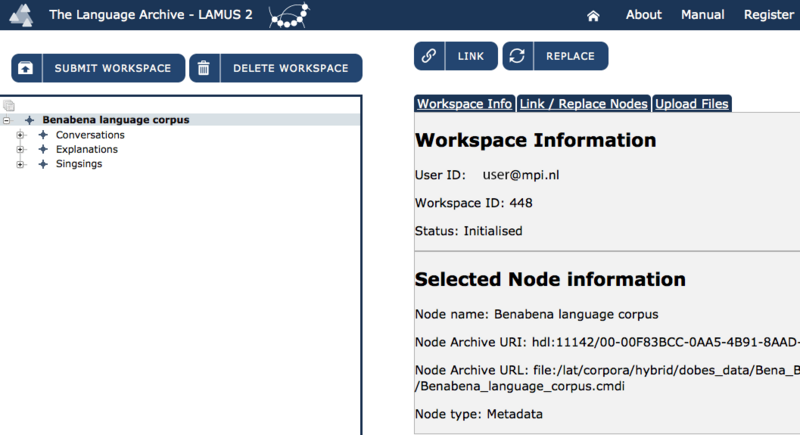
This window is the central page for all actions with regard to managing the contents and
adjusting the structure of the chosen workspace. The image below shows that each corpus is
organized in the shape of a tree-like structure (see Figure 3.1 and Figure 3.2). These trees are constructed with the use of corpus- and session nodes. A corpus
node, represented by a blue symbol in the tree view,
 is a specific point inside the structure of the corpus, and it is used to build
its general structure. Usually corpus nodes are grouped together on the basis of, e.g., the
geographical location, the discourse genre, the sex or age of the speakers, the dialect of the
speakers, the target/source language etc.
is a specific point inside the structure of the corpus, and it is used to build
its general structure. Usually corpus nodes are grouped together on the basis of, e.g., the
geographical location, the discourse genre, the sex or age of the speakers, the dialect of the
speakers, the target/source language etc.
Each corpus node may contain: a) other sub-corpus nodes; b) one or more session nodes.
Session nodes are important because they incorporate links to all actual data (i.e. video- and
audio files, information- and annotation files). They are represented by a green symbol  . The resources have also symbols
indicating the type of content, i.e. a speaker symbol
. The resources have also symbols
indicating the type of content, i.e. a speaker symbol  represents an audio file.
![[Note]](images/note.png) | Note |
|---|---|
If a node has the
|
 symbol, it
is set as protected. It cannot be changed or removed. There are several possible reasons
for this:
symbol, it
is set as protected. It cannot be changed or removed. There are several possible reasons
for this:LAMUS2 facilitates the construction of corpora, as shown in the picture above, using corpus nodes, session nodes and resources as building blocks. These elements are linked to one another and do make up the tree structure itself. The layout of the corpus structure is to be determined by the researcher. As every node or resource is linked to other elements in the tree, changes in the arrangement can easily be made by just adjusting these connections. Single resources or whole parts of the corpus can be unlinked from the tree structure to be used again in a different location. New elements can be uploaded to the workspace to be incorporated in the corpus.
The main interaction window provides information and feedback from the system about the actions performed by choosing the specific LAMUS2 function buttons.
Once you have created your new workspace (or opened an already existing one), you can start working on it by adding and/or removing nodes/resources.
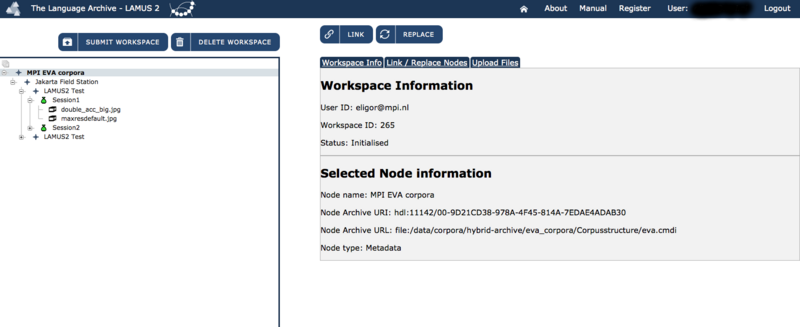
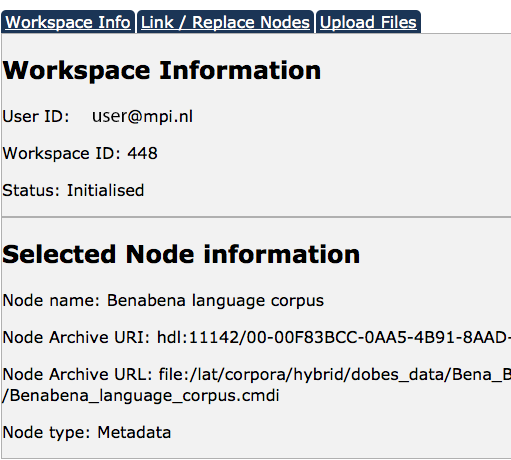
First of all, when you select the top node of your workspace, some information regarding the newly created workspace and the selected node are displayed (e.g. the user and the workspace IDs, the status of the workspace, the name and URL/URI of the node, and the node type).
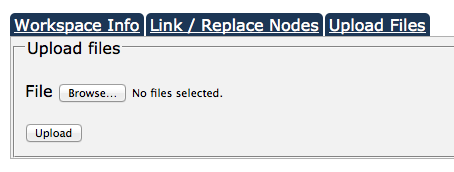
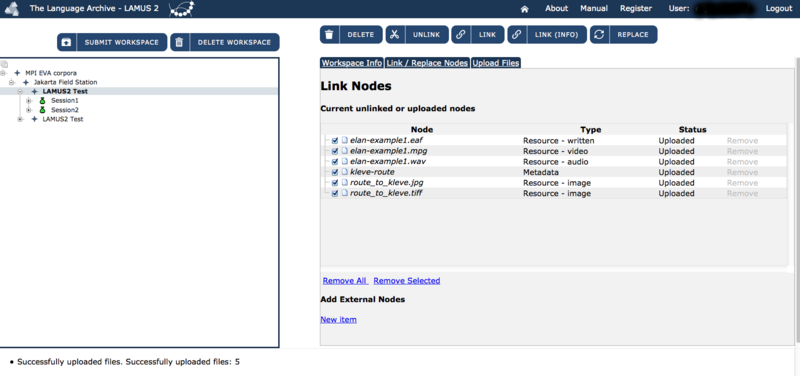
In order to add new content to the unlinked files container of the workspace you first have to select the Upload Files tab, and then click on Choose Files. From the folder window that will appear select the files you would like to upload and select Choose. Back in the Upload Files tab you should be able to see the number of files selected. At this point click on Upload: the info dialog at the bottom of the screen will display information such as "Saved files: ...", as well as information in case a file you tried to upload is not accepted by the archive.
Zip files can be also be uploaded and linked. In order to be uploaded you have to select the zip-file, or the folder containing the file(s). Lamus2 will extract zip files that you upload through the upload function. Zip files that contain a CMDI structure with the resources included will remain intact after extraction in Lamus2. Zip files created with 7-zip, winzip and winrar (only .zip based!) are known to work, as well as unix based zip files, such as OSX and Ubuntu.
Users in the MPI can also archive zip files as is, so without any extraction. This can be achieved by putting the said file(s) inside the Lamus or Unlinked_files folder which is located inside your workspace on the Corpora server.
Now that your files have been uploaded you are ready to link them to your workspace tree. Select the tab Link / Replace Nodes; here you will see all the previously uploaded, though not yet linked nodes. If you are an MPI user, you will see all the files that are in your Lamus or Unlinked_files folder too.
If you want to remove some of the uploaded nodes you will only have to select the Remove option located on the right of the Status column (see figure below) or you can checkmark the resource using the checkbox and then click the 'remove selected' option below.
| Note |
|---|---|
Removing unlinked files physically removes it from its location! If your file was in the lamus or Unlinked_files location (for MPI users), it will be deleted there! |
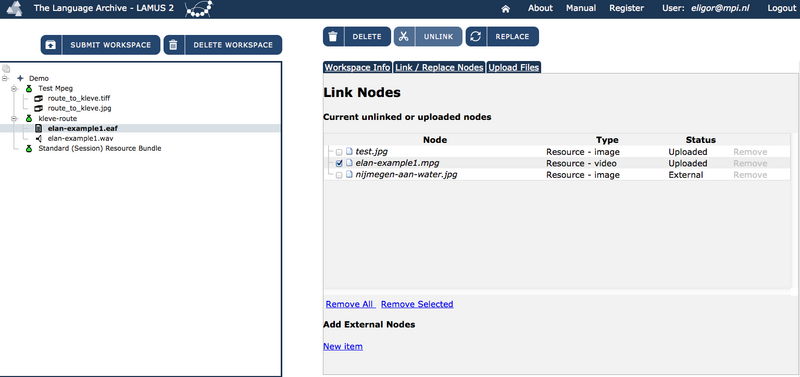
As you may notice, there is no linking option visible (yet). In order to be able to see it you have to first select the workspace tree node to which you want to link the node(s) (see figure below). Check the node(s) you want to link and select the Link option, above the tabs.
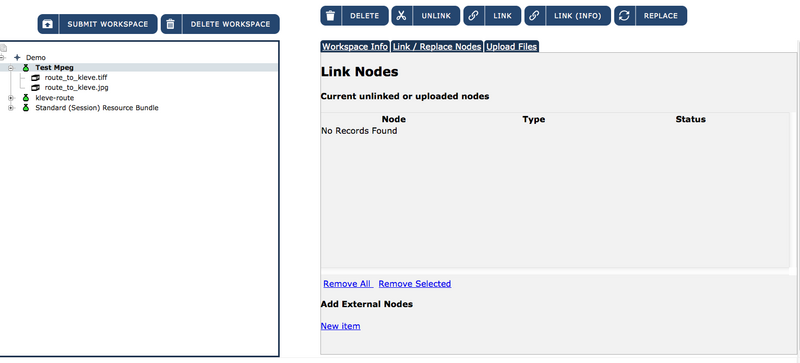
The linked node(s) will be moved from the list of unlinked files to the workspace tree.
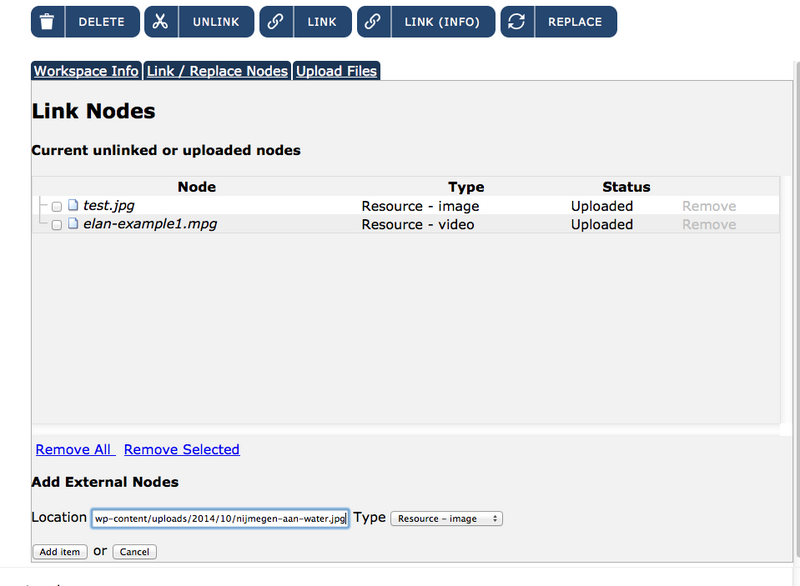
Apart from local nodes, you may also want to link external nodes to your workspace. An external node can be a url of an image, for instance. In order to do so:
- from the Link / Replace tab click on New Item, in the lower part of the table, under Add external nodes. A blank field will appear, together with the options add item and cancel.
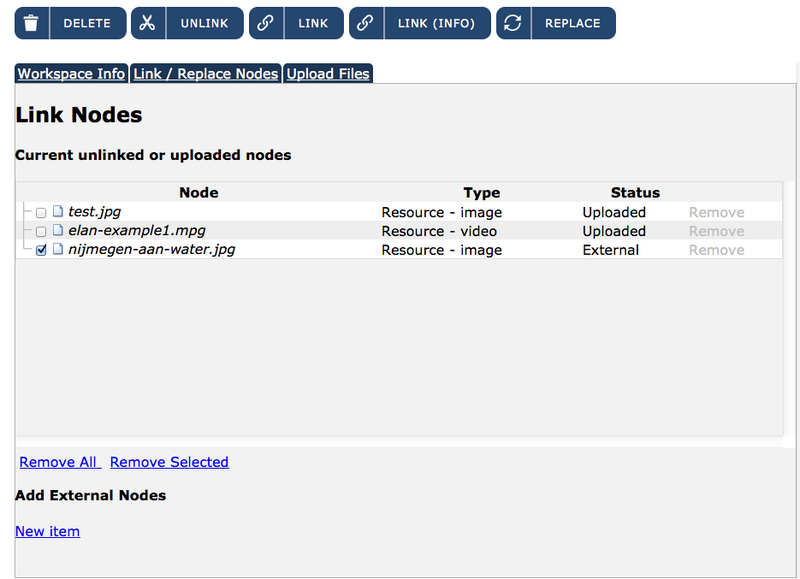
- enter the link to the external node (e.g. the URL of a web image) in the blank field and select add item. The new external node will now show up in the unlinked nodes table and you will be able to link it to the workspace tree like a normal node (see section 3.1.2 above).
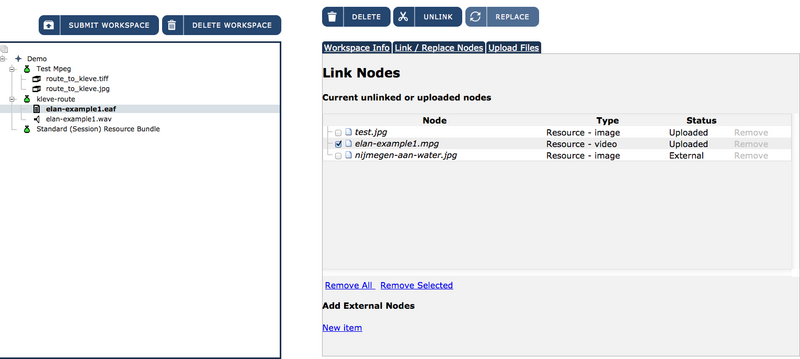
The files/nodes that have been linked to the workspace tree can always be unlinked via the option Unlink, located above the tabs next to Link.
As with the Link option, you first have to select the node (by highlighting it) that you want to unlink in order for the option to become visible.
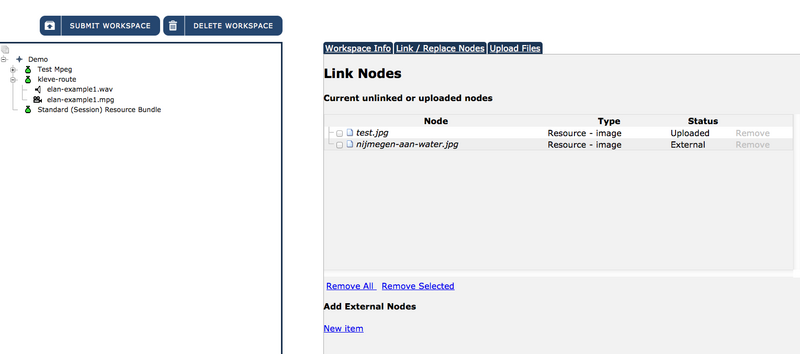
Keep in mind that the unlinked node (together with its contents, i.e. sub-nodes and resources) will not be deleted; on the contrary, it will go back to the list of unlinked nodes in the tab Link / Replace Nodes. The structure of the node does not get affected by this action. If the user decides to link it again, the contents will stay linked within that node.
Besides unlinking the previously linked nodes, you may also decide to completely delete them from the workspace tree. You can also delete uploaded files that have not been linked yet, in case it is needed.
You can do so via the option Delete, located next to Unlink, and visible only after having selected the node to be deleted.
Differently from unlinking, deleting implies that the node will not go back to the list of uploaded and unlinked files/nodes.
| Note |
|---|---|
Deleting nodes physically removes the resource files from its original location. If your files were in the lamus or Unlinked_files location (for MPI users), they will be deleted there! |

An already linked resource can also be replaced by another one (e.g. when a new version of the resource/file is available), located within the unlinked files tab.
In order to do the replacement, as in the previous cases of link, unlink, and delete, you must first select the node - in the workspace tree - that you want to be replaced. Then you select the node - in the unlinked nodes tab - with which you want to replace the other one. After having selected the two required nodes you can finally click on Replace. The location of the two nodes will be inverted.
| Note |
|---|---|
A CMDI file (corpus or session node) can also be replaced, but the CMDI file you want to use for the replace action has to be downloaded from the archive (it needs to have a handle assigend to it). It can then be altered (add information or resources to it) and uploaded to Lamus2 for replacement. If one tries to replace an archived CMDI file with a new, not yet archived cmdi file, the workspace will fail the next time you try to open it. |
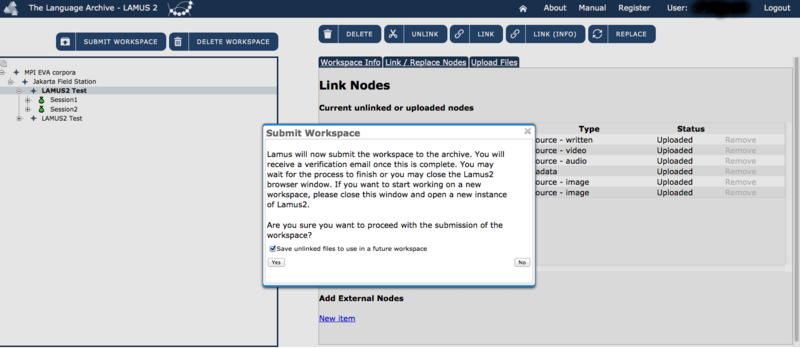
After the work on the active workspace is finished, it can be incorporated into the actual archive. To do so click on the option Submit Workspace, which is located on the top left of the panel.
A message will appear informing you the data will be moved to the archive. You can also choose to delete or save any unlinked files you uploaded previously, so you are able to use these files in a future workspace, in the same location. Because these files will be physically deleted from the workspace, make sure you do not need them anymore. For MPI users, files in your Sessions folder or Lamus folder on the network will moved to the archive location. Confirm the submission by clicking on OK.
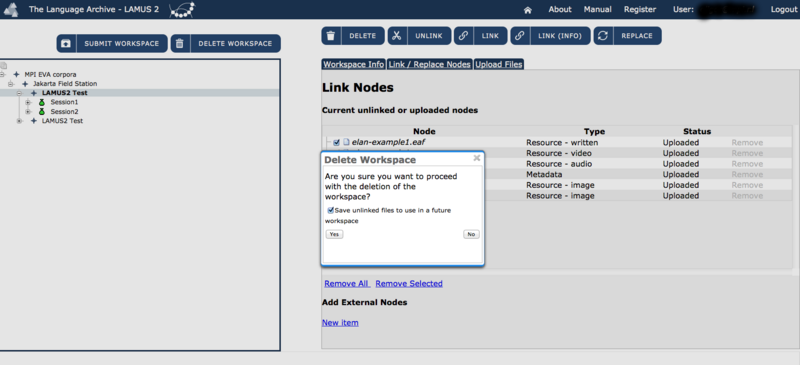
The Delete Workspace function button erases the current workspace. When there are still unlinked files present in the workspace, the user has the option to erase or save them as well by ticking the checkbox. Saved unlinked files can be accessed again in a new workspace in the same location. Because nothing is changed in the archive until the Submit Workspace function button is clicked, deleting the workspace has no further consequences for the contents or structure of the actual archive.
If you have not yet finished working on your workspace you can use the function button Logout to close it and store it for later use. The changes made to the workspace until the moment of logging out will be automatically saved.
Work on previously saved workspaces can be continued by choosing Open workspace from the LAMUS2 main page and by selecting the necessary workspace from the list (see section 2.2 above).