From the TLA website Arbil can directly be launched via Webstart[1], or downloaded and installed locally. The only difference between webstart and installed version should be that the installed version starts faster and also without an Internet connection (but on Microsoft Windows you will not get image previews in the webstart version). In any case you cannot change remote corpora and your work will be saved locally on your computer only. Of course you can use Arbil's export function to transfer your data to other locations.
When you launch Arbil for the first time some default collections will already be
displayed in the Remote Corpus tree. These collections
probably contain nodes or sub-nodes. To expand a tree in Arbil either double-click it, or
click on the symbol  in the
tree line. To work with one of these exports either right-click it and select Import
to Local Corpus or “drag and drop” it to the desired position in your Local
Corpus tree.
in the
tree line. To work with one of these exports either right-click it and select Import
to Local Corpus or “drag and drop” it to the desired position in your Local
Corpus tree.
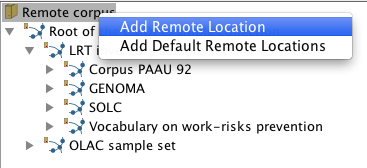
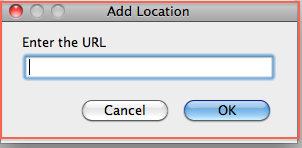
Right-click on Remote Corpus to add new Remote Locations. You will have to enter their address (see Figure 2.1). In Arbil you can get a corpus' address by selecting copy from the right-click menu. You can use this address to add it again at the root of the Remote Corpus tree (to facilitaty access to it). If there are trees in your Remote Corpus that you never use, you can remove them by choosing Remove Remote Location from the right-click menu.
In the same way you can add and remove some of your computer's directories (folders) as Working Directories to later import resources (for instance media files and written resources) from them. If you add files to these directories while Arbil is running you will have to reload (right-click menu) the directories to see the new files in Arbil.
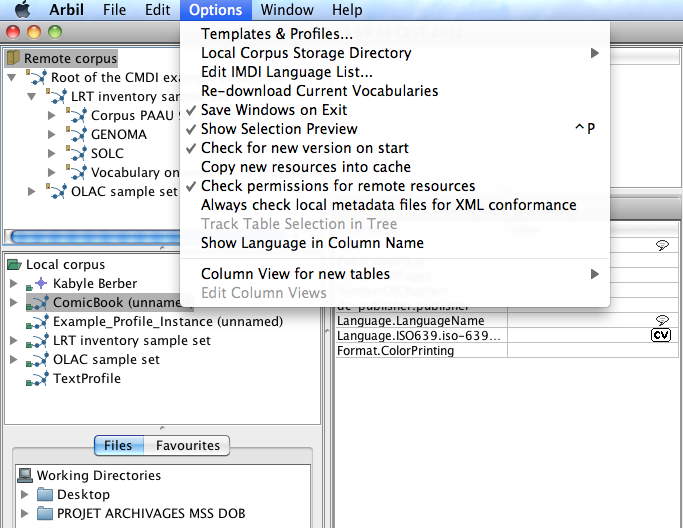
In Arbil's Options menu (see Figure 2.2) there are more (setup) options, some of which have further explanations in a tooltip (which you will see when keeping the mouse pointer still over them for a second).
Under the option Templates and Profiles, you will be able to see the available CMDI profiles. You can select from the list or add new ones, using the dialogue box Add URL and pasting into it the URL of the profile you want to import.