There are two ways of adding resource files (e.g. audio, video etc.) to a session:
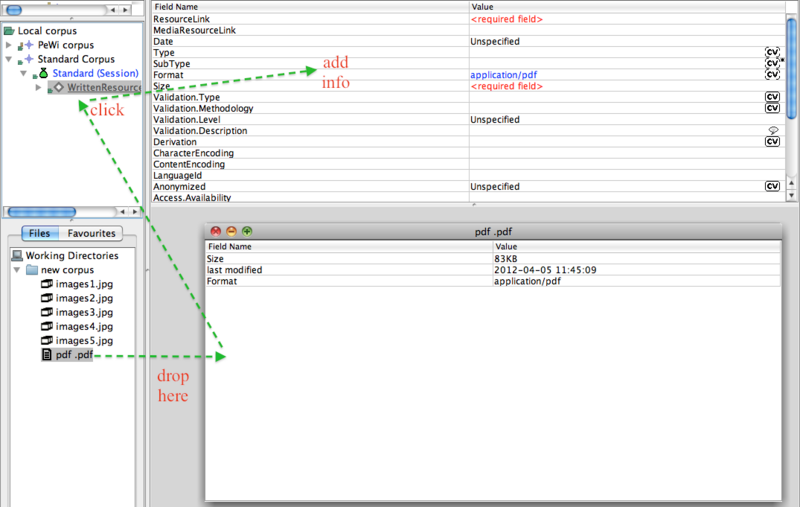
(1) The easiest way is to drag and drop a given element from the Working Directory to a session node in the Local Corpus. All information about the resource (e.g. its size, type etc.) will be filled in automatically.
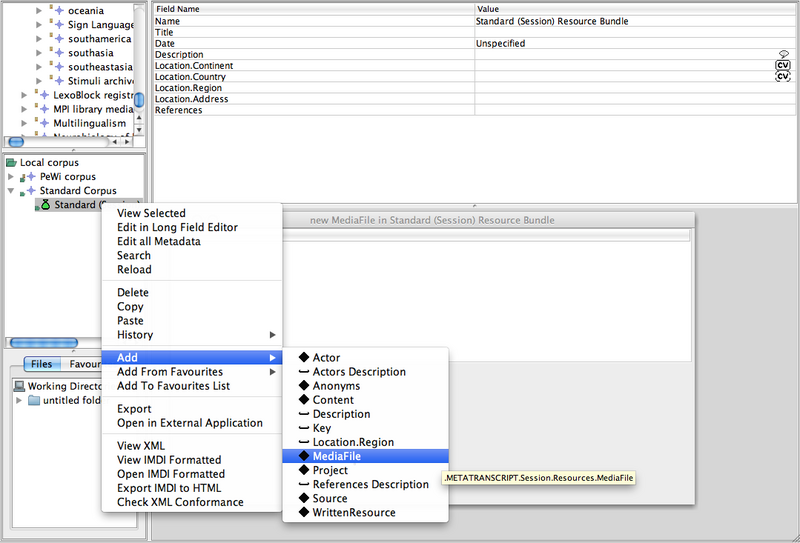
(2) It is also possible to add it by right clicking on a session node in the Local Corpus and choose Add > Media File or Add > Written Resource. In the latter case, however, you will have to fill in manually the metadata of the file, its location, its media type, format and size in the window that will appear.
Note that not all file types are archivable. If a file is not archivable, you will not
be able to drag and drop it (any problem with the file will be illustrated by the
 icon).
h
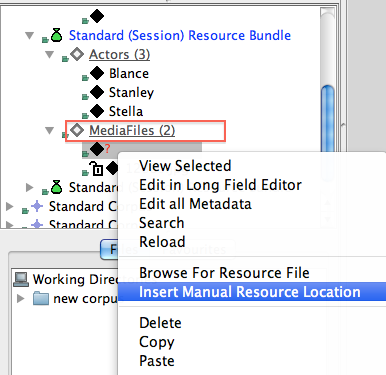
It is also possible to manually add resources from a remote location, i.e. the archive or the web. This can be done by right clicking on a node that supports a resource location (IMDI media file or written resource), selecting Insert Manual Resource Location, and adding the URL in the window that appears in the table area.
When multiple resources are added from the Working Directories to a session in the Local Corpus, they will get processed together and appear in a single table in the table area.