As the last step, you need to create a corpus node in the IMDI Browser. To create such a node, do the following:
Open the IMDI Browser.
At the bottom of the Metadata Descriptions Tree panel, enter the location of the IMDI Corpus file into the field labeled Root URL. Press ENTER.
The corpus node, together with its subcorpus nodes and sessions, is displayed in the Metadata Descriptions Tree panel, e.g.:

Figure 5.8. Metadata Descriptions Tree panel in the IMDI browser
Enter the directory of the IMDI Corpus file and press ENTER
The new corpus is displayed here
To save the new corpus node permanently, do the following:
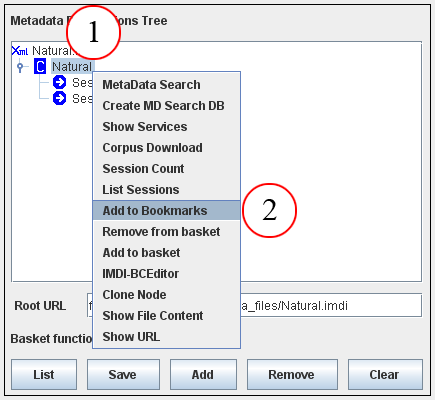
In the Metadata Descriptions Tree panel, click on the corpus node to select it.
Right-click on the selected corpus node.
A pull-down menu appears.
Choose from the pull-down menu.
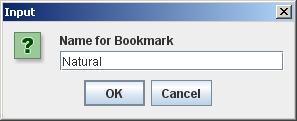
The Input dialog window appears.
Enter a name for the bookmark and click .
The new corpus node is saved as a bookmark in the Bookmarks panel. Every time you restart the IMDI Browser, you can access your corpus via the Bookmarks panel (see the separate manual 'IMDI Browser' for details).