Interlinearization mode is a text oriented mode designed for parsing and glossing annotations to one or more lines of interlinearized text. This can be done manually or with the use of one or more so-called Analyzers. The segmentation and (typically) the transcription of speech events need to be done in one or more of the other modes before interlinearization can be added in this mode.
Analyzers are software modules that accept an annotation as input and produce suggestions for one or more annotations, on one or more tiers, as output. Examples of the type of processing analyzers can perform are tokenization, morphological parsing and lookup of glosses. The behavior of some analyzers can be configured in a settings panel. Some analyzers need a connection to a lexicon, others can perform their task based on the input alone. Analyzers are implemented as extensions so that third party users and developers can create and add their own analyzers. At least eventually: the LEXAN API, as it is called, still has to be finalized, documented and published.
Part of the user interface of this mode is a Lexicon panel, the front-end of a Lexicon Component module. It allows to create, import and edit a lexicon and its entries. Lexicons are stored separately from annotation data in a new data format. These are the lexicons that analyzers can get access to.
To start the Interlinearization mode, click from the main window.
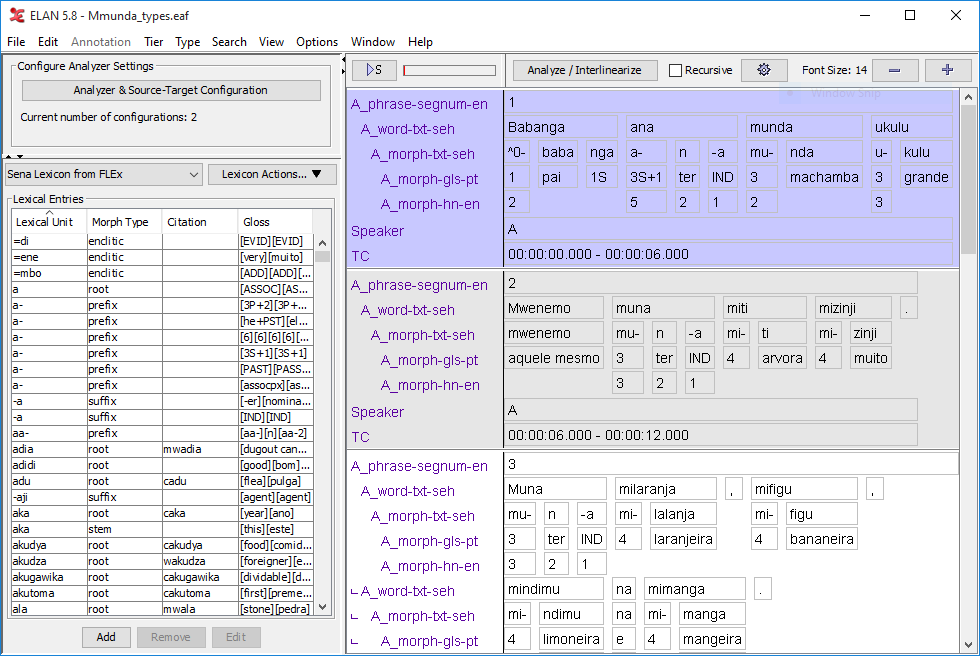
The main screen is split in two, the left side containing 2 panels, the right side consisting of a single panel.
Top-left panel: contains a single button which gives access to several configuration windows, both for analyzer settings proper and for configuration of source and target tier types for analyzers.
Bottom-left panel: Lexicon editor. Lexicons may be used by an analyzer and are user-defined.
Right panel: Viewer and editor showing the annotations in an interlinear text style.
To start working in Interlinearization Mode, you need to have already set up a tier structure and have to have some segmentations (annotations on a top level tier). The values of annotations can be edited in this mode and annotations on dependent tiers, including subdivisions, can be created, but not primary segmentations on top-level, independent tiers. This can be done in Annotation mode and/or Segmentation mode. It is still possible to add new tier types and tiers in this mode (please refer to Section 2.3 and Section 2.4 for more information about tier structures).
If you want to use an analyzer that requires a connection to a lexicon, you should first create or import a lexicon and link one or more tier types to specific fields in a lexical entry (see Section 2.3.1 and Section 2.7.2).
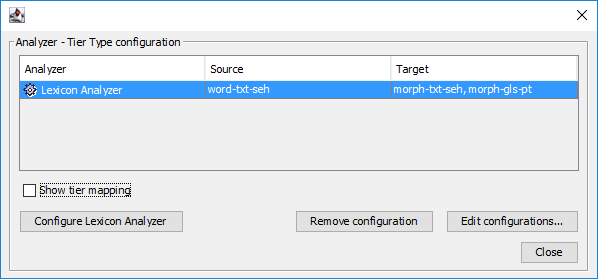
In order to analyze/interlinearize annotations with the assistance of an analyzer (i.e. other than strictly manual annotation), some configuring is required first. The top-left panel, titled Configure Analyzer Settings, shows the number of current configurations below the button which opens a separate window when clicked, see below.
Configuration of analyzer settings consists of two parts:
Required: specification of source and target tier types. Analyzers need input text and the system needs to know what the input source is. Analyzers will produce output and the system must know what the target(s) is (are). Source and target(s) specifications are based on tier types; the types will resolve to combinations of tiers based on those types.
Optional: an analyzer might provide a way to modify settings and thus to change its behavior. But it should work with default settings too.
By ticking the checkbox the table shows to which tiers each "analyzer-tier type" configuration applies. E.g. in case there are three speakers and the speech tier for all speakers use the same tier type, three tiers will be listed if that type is selected as source of an analyzer etc.
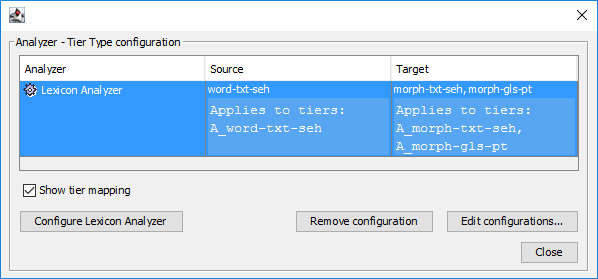
To add new configurations or edit existing ones click the button to the right. The removes the selected configuration, if any.
In the dialog that appears, you can, working from left to right, choose the analyzers you would like to use and set the source and target tiers for each analyzer.
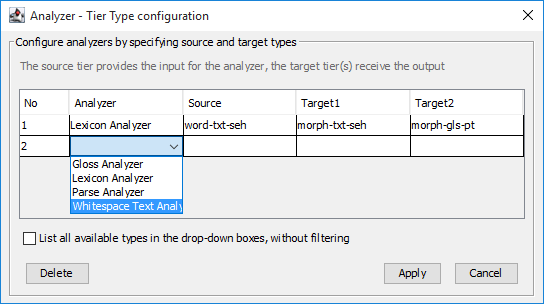
First, you choose a certain analyzer, as described in Section 3.5.2. You can configure multiple analyzers, one per line.

Each chosen analyzer will need a source and at least one target tier type for it to function. The source and target tier should not be the same. By default, the user interface tries to assist in the setup by only listing types in the source and target columns if certain constraints are met. E.g. in the column for the source a tier type is only listed if there is at least one tier based on that tier type and if that tier has at least one dependent tier (which can then be selected as target).
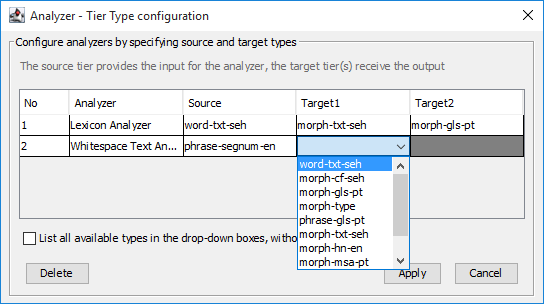
In the columns of the target tier types only tier types are listed for which there is at least one tier created as dependent tier of a tier of the source type. If the analyzer supports two target tiers the rightmost column will allow selection of the type for the second target, otherwise this column will be disabled.
When the checkbox is ticked, the check on source and target types is not performed and all tier types of the transcription are listed. After selecting the target type(s) a warning message might still be shown that there are possible issues with the configuration, but the user can choose to ignore this.
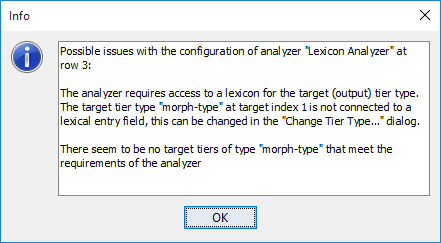
Figure 3.28. A warning concerning a missing link to a lexicon field or the absence of suitable tiers
Some constraints are not checked:
if an analyzer potentially produces multiple (suggestions for) annotations, the type of the target should be one of the subdivision types. This is not enforced.
![[Note]](images/note.png) | Note |
|---|---|
If an analyzer needs access to a certain field in a lexicon the selected type for the source and/or the target should be linked to the proper field in the right lexicon, see Section 2.3.1. This way the analyzer knows which lexicon and which field to query. |
When you are done with the configuration, click to finish and go back to the main dialog with the table listing the current configurations.
| Note |
|---|---|
Sometimes, especially after changing an existing configuration, it is necessary to save the file and open it again to see the effect of the changes. |
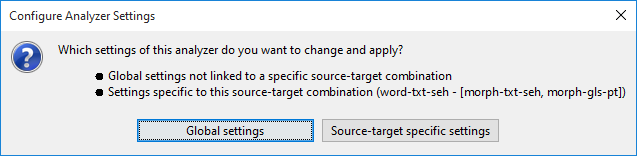
A selected configuration can be removed here too by clicking the button. If the selected analyzer supports customization of settings, the button will be active and clicking it will show a Configure Analyzer Settings window (double clicking the analyzer in the table has the same effect). But before the actual analyzer settings window opens, you can choose whether global settings or configuration specific settings are going to be updated. This allows for different settings for an analyzer for different source-target combinations, e.g. depending on the language of involved tiers. In case of doubt choose Global Settings.
The next section describes some analyzers and their settings.