If you want to perform a detailed search over multiple EAF-files, but the options offered by Search multiple EAF (see Section 4.2) are not comprehensive enough, you can use yet another search mode. This allows you to restrict the search domain to certain tiers, to use regular expressions, etc. while examining multiple annotation files at once. This search function will search for (whole) words to match the given query, but also will match parts of words that match the query.
The function can be reached via . When you click on this option for the first time, you will be
asked to define a search domain in the form of one or more .eaf
files. The next time you open the Structured search, it uses the last defined search
domain. The search window offers the possibility to define a new search domain: click on
and do one of the following:
Select an existing domain from the list and click . (Click if you want to delete the domain.)
Create a new domain:
Click
Click in the new dialog on the Look in pull down box and browse to the directory that contains the annotation files.
Double-click an annotation file (
*.eaf) to select it. It now appears in the rightmost box. Alternatively, you can click on the annotation file name and click the button.Repeat this for every annotation file you want to include.
It is also possible to select a complete directory. All
.eaffiles in a selected directory will be included.Click to continue the exporting process; otherwise click to exit the dialog window without exporting.
If you clicked you can save this domain: enter a name and click . If you do not want to save the domain click .
Create a new domain from an IMDI search:
Click
Browse to and select an IMDI file that has been exported from a metadata search in the standalone IMDI Browser.
Click .
You can save this domain: enter a name and click . If you do not want to save the domain click .
After defining a search domain for the first time or when you open the Structured search with a search domain from the previous usage, the following window will open:
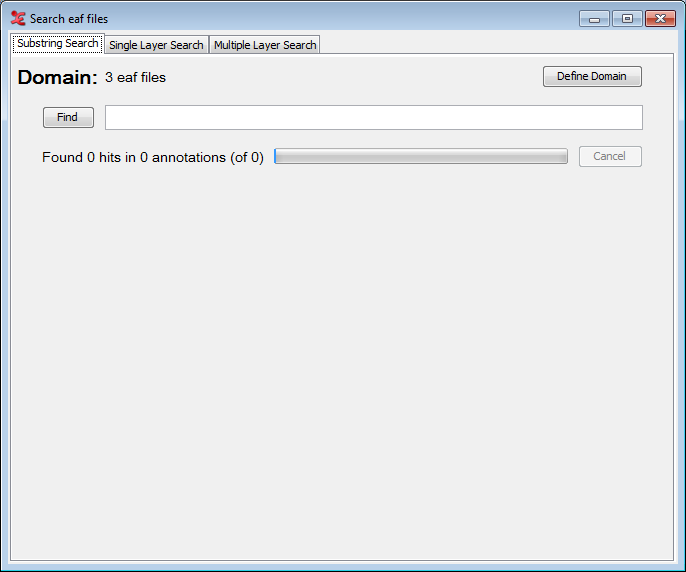
As you can see there are three tabs offering different kinds of search:
: finds all annotations in which the search string occurs (see Section 4.4.1).
: finds all annotations or N-grams in which the search string or regular expression occurs, both case sensitive and insensitive and possibly restricted to one (type of) tier (see Section 4.4.2).
: finds annotations in three related tiers. You can use multiple search strings and regular expression and make constraints on duration and time slot as well as constraints on how to search strings are to be combined (see Section 4.4.3).
This tab offers the simplest search. It just asks for a search string. After entering the search string you can click on (or press Enter) to start the search process. This will result in a screen like the one below:
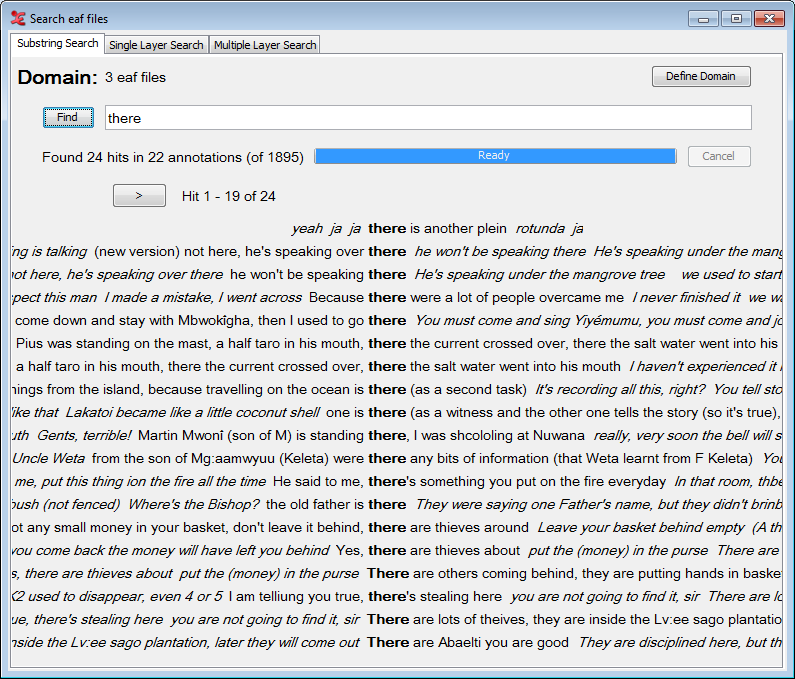
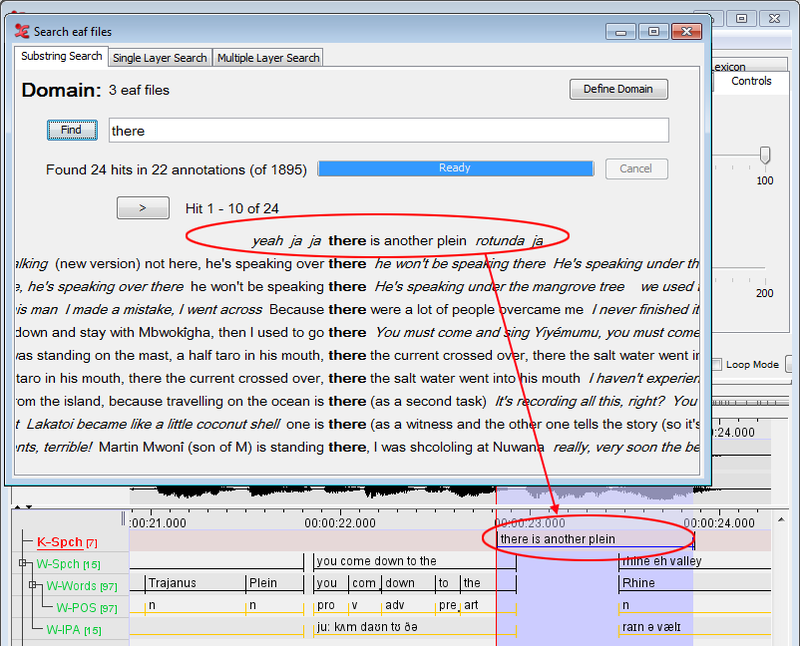
It shows tokens that contain the search string and some tokens in the context printed in italic typeface. The default number of tokens in the context is three on both sides. When the number of hits exceeds the maximum number the window can contain, you can view the rest of the hits by clicking the and button that appear above the list of hits to go back or forward one page. To view an annotation in the timeline view of the main window simply double click it:
For further investigation of the results the search window offers a context menu that enables you to view the results in other manners and to save the results. To open the context menu right click on one of the results. The menu has the following options:
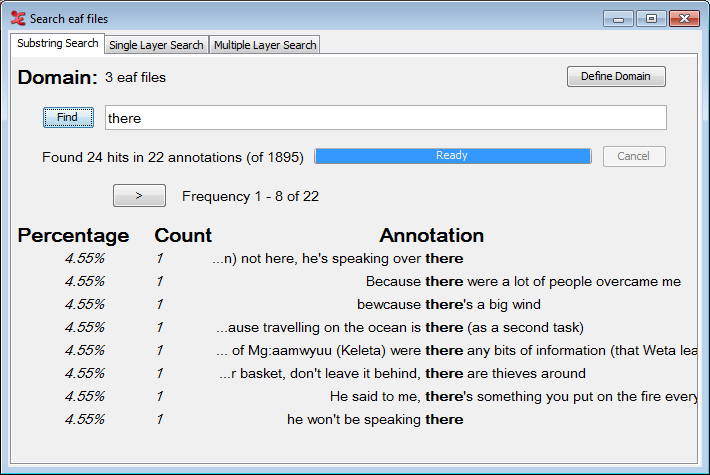
: clicking this option shows both frequency and relative frequency (as a percentage) of the tokens found. The relative frequency is relative to the number of hits.
: This will display the frequencies, sorted by count.
: This option will show you an aligned view of the search results, and there are a number of options you can set. You can change the time scale, hide or show info balloons and set the visible columns (through the context-menu).
: clicking this option shows the transcription in the timeline viewer similar to double clicking an annotation.
: by clicking this option you enable ELAN to show you information about a token in an info balloon. This balloon will appear when your mouse cursor is hovering over a token. The information shown in the balloon contains:
Transcription file
Tier name
Tier type
Participant
Position in tier
begin time
end time
duration
: this option offers a sub menu that enables you to decrease and increase the context size of the results. Minimum size is 0 and maximum size is 8 tokens.
: click this option to change the font and font size of the results.
: when clicking this option, you will be asked to select a directory and enter a file name. The result is a file that contains the following information per token found:
Annotation: the annotation token containing the search string.
HitPositionInAnnotation: the position of the first character of the search string in the annotation.
HitLength: number of characters in the hit
HitNumberInAnnotation: if the search string is found more than once in an annotation, this number will give the rank of the hit within the annotation.
AnnotationBeginTime: the begin time in ms of an annotation containing the search string.
AnnotationEndTime: the end time in ms of an annotation containing the search string.
HitPositionInTier: the position of the annotation in a tier.
TierName: the name of the tier containing the annotation.
TierType: the type of tier containing the annotation.
LeftContext: the left context of the annotation.
RightContext: the right context of the annotation.
TranscriptionName: the path and file name of the transcription in which the annotation is found.
: clicking this option lets you save a file that contains hit statistics. The export dialog contains the following options:
Separate hit count per hit value: if checked there is a line of statistic for each hit. If not checked, there is line per file.
Include file name column.
Include file path column.
Time format: specify whether the time format should be in milliseconds (ms) or seconds and milliseconds (sec.ms).
After clicking you can enter a file name and click to save the statistics file.
When you are in frequency view or frequency view (by frequency) (Figure 4.21), the context menu (right-click) has the following options:
: clicking this option will show the annotation results.
: clicking this option shows the transcription in the timeline viewer similar to double clicking an annotation.
: when clicking this option, you will be asked to select a directory and enter a file name. The result is a file that contains the following information:
Annotation
Percentage
Count
The alignment view allows you to view your search results in an aligned time-based view. For detailed information about the Alignment View, see Section 4.4.3.1.