In LEXUS the lexical entries are displayed according to the views that you can create. By default there are two views available, List View and Lexical Entry View. According to the requirements of your lexicon, they can be easily modified. LEXUS uses the former view to display the word list of your lexicon and the latter one to show the graphical representation of your lexical entry.
Once the structure of the lexicon has been created (and before you start to add lexical entries), in the Schema and View Editor select the View Editor tab in the right frame. You will see the two previously mentioned default views: List View and Lexical Entry View which, by default, are assigned to the list and the entry views (in the Apply View frame).
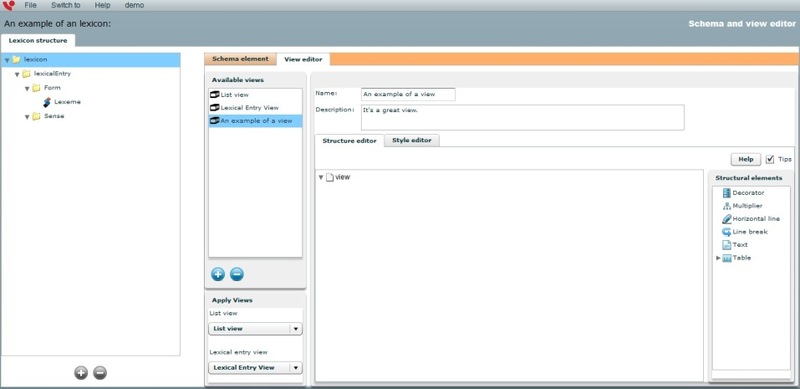
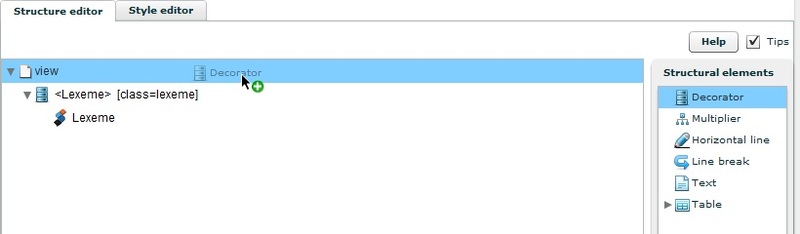
While creating a view, you can always click on the Help button in the right frame. Moreover, you can also check the Tips box. If you hover over the elements in the view structure, you will get information of what they are.
You can either modify the existing List View or create a new one. In this section we will guide you and help you create a new view. Once you know how to do that, you will be able to modify the default List View (this is optional).
Click on the  icon under the
window with Available Views and give your new view a
name and a description. First, you should decide which data categories from the
structure of the lexicon should be used to represent the lexical entries in the word
list. Usually the data category Lexeme is used for
this and that is why Lexeme is already part of the
List View by default.
icon under the
window with Available Views and give your new view a
name and a description. First, you should decide which data categories from the
structure of the lexicon should be used to represent the lexical entries in the word
list. Usually the data category Lexeme is used for
this and that is why Lexeme is already part of the
List View by default.
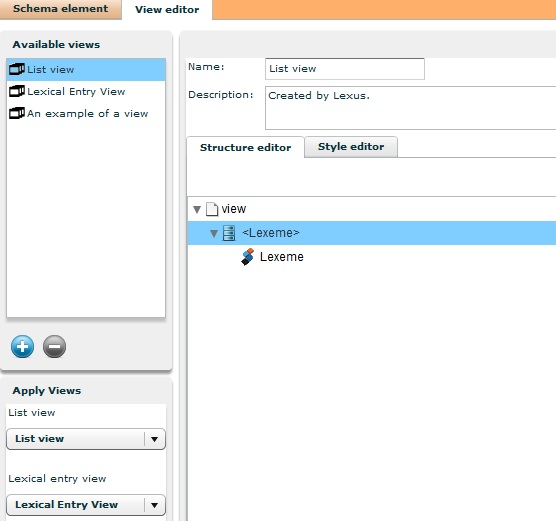
To add more elements, drag a data category (as Lexeme) from the from the tree into the Structure Editor window under View. It will appear under it. In practice it means that now in the word list of your lexicon the content of Lexeme will be displayed.
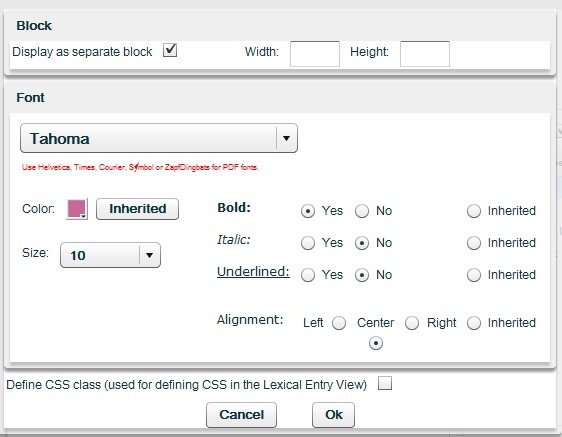
You can now change the style properties of this item: font size, font type, colour, bold, italic etc. Drag the Decorator element on the right to the element View in the Structure Editor and drop it. It will appear below Lexeme. Drag and drop Lexeme into the Decorator. The Decorator will now have a new name: <Lexeme>. Double click it and choose a new styling method. Be aware of the Inherited function. If Inherited is chosen, the elements will be styled according either to the default style or the style of the element that is hierarchically above them in the lexicon structure. The Display as Separate Block function allows the full block inside the Decorator to be shown in a separate line.
Watch the video:
For those who know CSS, it is worth to mention that the view can be styled by using CSS as well. Double click on the data category element in the tree and mark the option Define CSS class. Name the class that you will be using for this element and click on OK.

The element will change its name. Go to the Style Editor tab and select Add styles for classes.
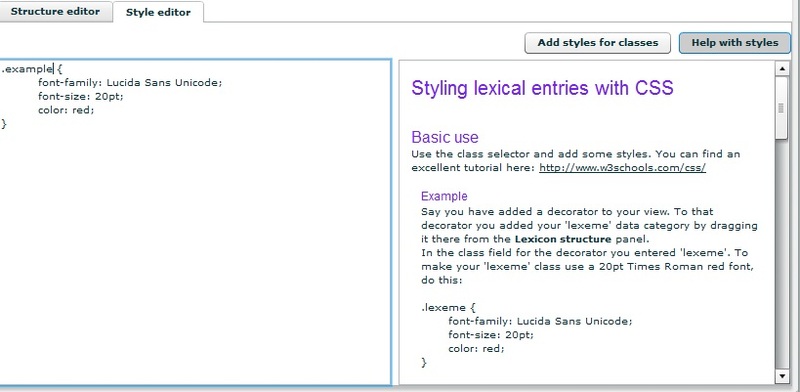
If you need help with defining the CSS class, click on the button Help with Styles which will help you to style lexical entries with CSS.
In the same manner you can add to / modify data categories of the and change their layout. Be careful not to add too many data categories to the view, since this will create a chaotic view in the word list. Moreover, the order in which you add data categories to the list view should follow the structure of the lexicon. E.g. If your structure consists of a lexeme with a sub-structure, followed by a sub-entry with a sub-structure and you wish to display the lexeme with its gloss and the sub-entry with its gloss, insert them in the following order: Lexeme, Gloss, Sub-Entry, Sub-Entry-Gloss. To delete an element from the tree structure, select it and press the Delete button on your keyboard.
After you have created/modified your view, make sure that it is selected in the drop-down menu under Apply Views > List View (below the available views).
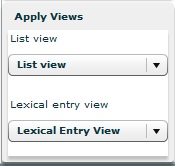
Note that the List View and Lexical Entry View have to be different. Save the changes (File>Save) and go to the Lexicon Editor module.
The List View that you have created has now been applied to your lexicon word list. (Note that, as shown above, new lexica are created with one example lexical entry, Lexeme). If you have not created any lexical entries yet, you will need to do that first to see the results (Section 2.3).
If you want to delete a view, select it and click on the  icon. However, be aware that it is not
possible to remove assigned views that are used at the moment.
icon. However, be aware that it is not
possible to remove assigned views that are used at the moment.
After you have defined your list view (either your own or the default one), you can also define the Lexical Entry View (again, you can either create your own or modify the existing one). The Lexical Entry View is the representation of the lexical entry on the screen after it has been selected from the word list. This means it is a far more elaborate view of the lexical entry.

In comparison to the List View, the structure of the Lexical Entry View is usually longer. Therefore, you are expected to add many data categories to the view. The previous section shows how to create and modify that (see Section 2.2.2.1).
The views tree in the Schema Editor allows you:
(1) to copy data categories from the structure tree to it. In this operation the dragged data category will be placed as the last child of the element under the drop location,

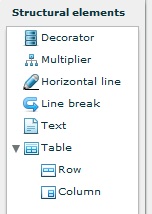
(2) to copy visual elements from the right side list to it (e.g.Decorators, Multipliers, Line breaks). Again, in this operation the selected element will be placed as the last child of the element under the drop location,
Moreover, for the Lexical Entry View it is possible to create Tables in which LEXUS will display all the data categories you want. Tables are mainly used to structure the layout of visual elements. Here follows an example of a simple tree structure with a table:
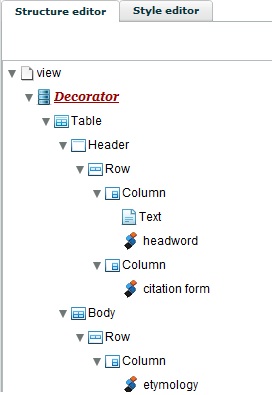
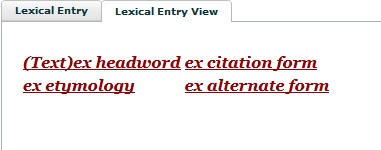
The result of the view structure presented above, in the Lexical Entry View (the Lexicon Editor module) is the following:
Also, you can apply Multipliers (allows you to replicate visual structures for each occurrence of the same data category in a certain lexical entry), Horizontal lines (inserts a horizontal line in whatever position), Line breaks (inserts a line break in whatever position) and Text (allows to insert any text value).
Watch the video: