The interlinearization panel
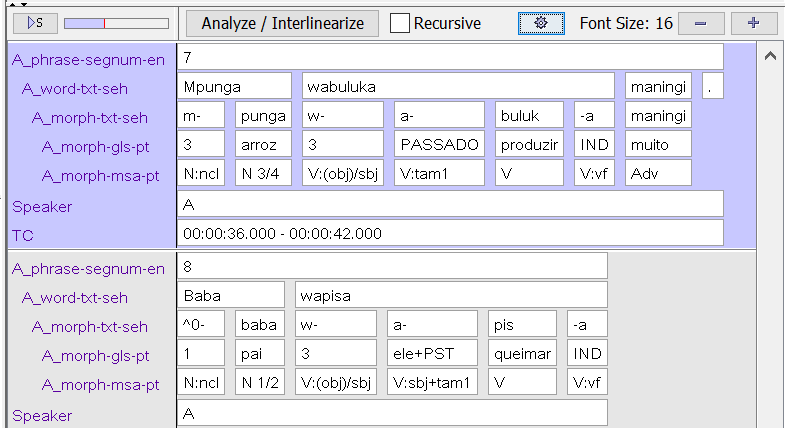
The interlinearization panel shows the tier structures and the annotations that were created in e.g. the annotation mode. The annotations are displayed in cells, like in a table or a list, each cell containing a top level annotation and its dependent annotations. The annotations of all visible top level tiers are sorted on time and then added to the cells. This is the main editing area in this mode, for manual and for assisted annotation. In this panel the configured analyzers can be invoked, either for an individual annotation or for a sequence of annotations, via the button. The result(s) produced by the analyzer will either be shown here in a Suggestions Window (if there are suggestions to choose from) or immediately applied and added to the designated tier(s) as determined by the analyzer configuration.
Figure 372. Interlinearization Panel
 |
The panel has a small "toolbar" at the top with the following options:
The panel allows to play back the audio of the interval corresponding to the selected cell (light blue background). A small progress bar shows the playback progress within the interval. The source of the audio is the first media file in the list (the "master media").
The button starts an automatic, sequential processing of annotations, starting from the active annotation (or the first one of the right type in the view) and then continuing to the right and to the bottom. If the analyzer produces multiple suggestions and user interaction is required, it will pause when the suggestions window is on screen, until the user selects one of the suggestions and the analyzer will continue with the next annotation. When the suggestion window is closed with the ESC key or by clicking the window button, this ends the automatic processing. Clicking inside the suggestions window but outside of any of the suggestions, will ignore these suggestions but continue with the automatic processing.
The option only has an effect if there are more than one analyzer source-target configurations. When this checkbox is selected, annotations created by an analyzer will in turn be analyzed, if the first analyzer's target tier is configured as a source tier for another analyzer.
The Font Size and buttons decrease or increase the size of the font(s) in the panel. The keyboard equivalents are CTRL+- and CTRL++ (CTRL+=).
The divider to the left of the button can be dragged to change the width of the area of the tier labels.
The button creates a dialog in which the user can customize margins and colors used in the interlinearization panel.
Figure 373. Interlinear editor configuration window
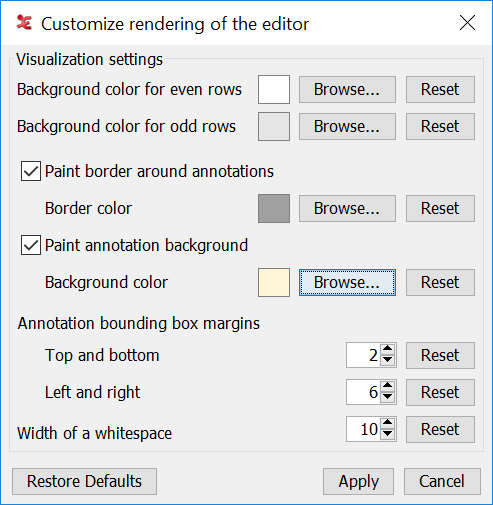
The following properties can be set:Two background colors for alternating rows.
Background and border color of the annotation boxes (if any).
Horizontal and vertical margins in pixels between the text and the border of the annotation boxes.
The width in pixels representing a white space between annotations (1 - 20).
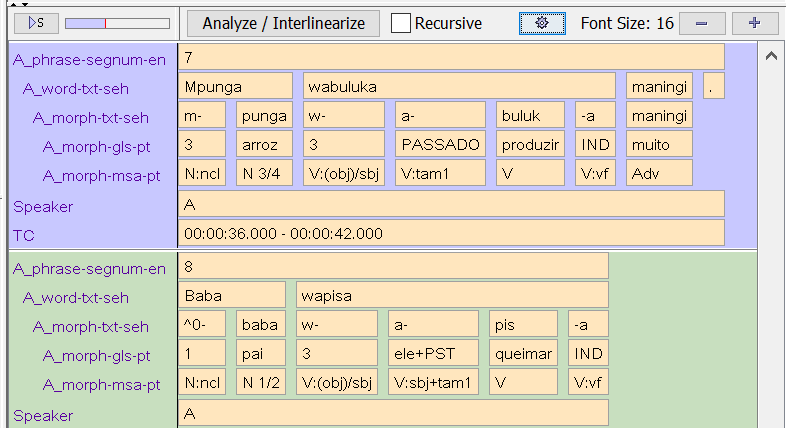
Figure 374. Customized Interlinearization Panel
The tiers that are visible in the editor can be configured via the right-click context menu of the tier names area.
Figure 375. Visible tiers context-menu
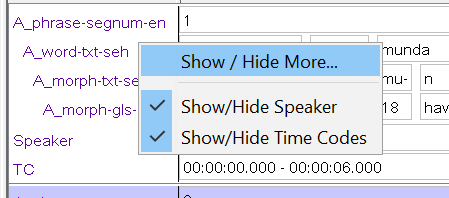 |
The option opens the same window as described in the section called “Switching tiers on/off” and in the section called “View tiers by Type/Participant/Annotator”. The Speaker tier is not a real tier but it shows the Participant attribute of the top level tier in this cell. The TC (time code) tier shows the begin and end time of the top level annotation in this cell.
![[Note]](images/note_1855015319.png) | Note |
|---|---|
Hiding the top level tier(s) hides all depending tiers, effectively removing the corresponding cells. |
A context-menu will also be shown when right-clicking an annotation. Depending on the annotation there can be different options. This allows you to start interlinearization of an annotation, delete an annotation, or add new annotations.
Figure 376. Interlinearization context-menu with Analyze option
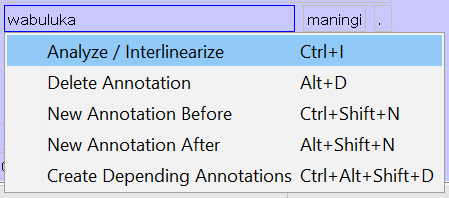 |
If the active annotation is on a tier that is the source tier for any of the analyzers, there will be the option, which invokes the analyzer with this annotation as input. The option the section called “Deleting annotations” will always be there, while the section called “Entering annotations before/after other annotations” and the section called “Creating depending annotations for a active annotation” are available depending on the type of tier the annotation is on.
Figure 377. Add Underlying-Form context-menu
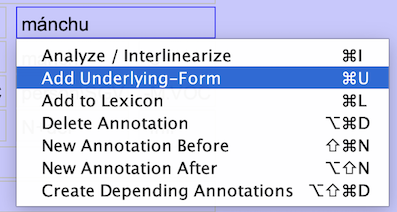 |
If the active annotation is on a tier that is the source tier for Lexicon Analyzer, there will be the option, This action opens the Add Underlying-Form dialog the section called “The Underlying-Form” and adds the underlying segments for this input word
Another option is also only available for some annotations.
Figure 378. Context-menu with Add to Lexicon option
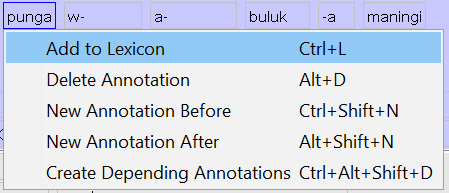 |
The option is only available for annotations that are on a tier that is linked to a field in a lexicon (via its tier type). This action opens the new entry window (Figure 366, “Add a Lexical Entry”) and adds the value of the annotation to the corresponding lexical entry field.