Export to a REFI project file
The REFI-QDA Standard is a file format for exchanging data between qualitative data analysis (QDA) software applications. The approach to annotation and analysis in these applications seems to be somewhat different from that in ELAN and similar tier-based annotation applications. This is reflected in the concepts registered in the REFI format; some map quite well to ELAN concepts, others don't have an obvious counterpart in the EAF format.
One of the concepts that does map quite well is
that of Transcript, in ELAN usually represented by one transcription tier
per speaker. Similarly the concepts of Source, User and
Selection (or Segment) translate relatively easily. On the
other hand, the important REFI concepts of Codebook and Code
don't seem to map to ELAN elements in a straightforward way. Closest equivalents seem to
be Controlled Vocabulary and Controlled Vocabulary Entry, even
though the way Codes are used and applied in QDA applications seems to
differ from how CV's are usually used in ELAN.
Despite these differences, there can be cases where export of an ELAN project (i.e.
multiple EAF files and the linked media files) to the REFI format makes sense. Therefore
an option has been added to export ELAN files to the REFI .qdpx project
exchange file format. The implementation is based on best guesses of how concepts should
be mapped, while providing some means to configure the output. The results have been
tested in trial versions of a few of the involved QDA applications (most of them require
a paid license), with varying degrees of success. This export is only of interest to
uers who have access to a QDA application and are familiar with the concepts mentioned
above.
A REFI .qdpx file is a zip file with a predefined
structure. Central in the .qdpx file is a project.qde file, an
XML file based on the REFI-QDA standard's XML schema file.
Next to this file is a folder named Sources, which can contain different
types of source files, such as plain text .txt transcript files and
possibly audio and/or video files etc. The .qde file contains the
Codebook and entries for each audio/video file in the project, each entry
with links to the media file and to the produced transcript file and possibly containing
Syncpoint and/or Coding elements.
To start the export, click ->-> This creates a 3-steps export window:
Step 1/3: Selection of files and of Transcript and/or Coding tiers
Figure 176. Export as REFI project file, step 1
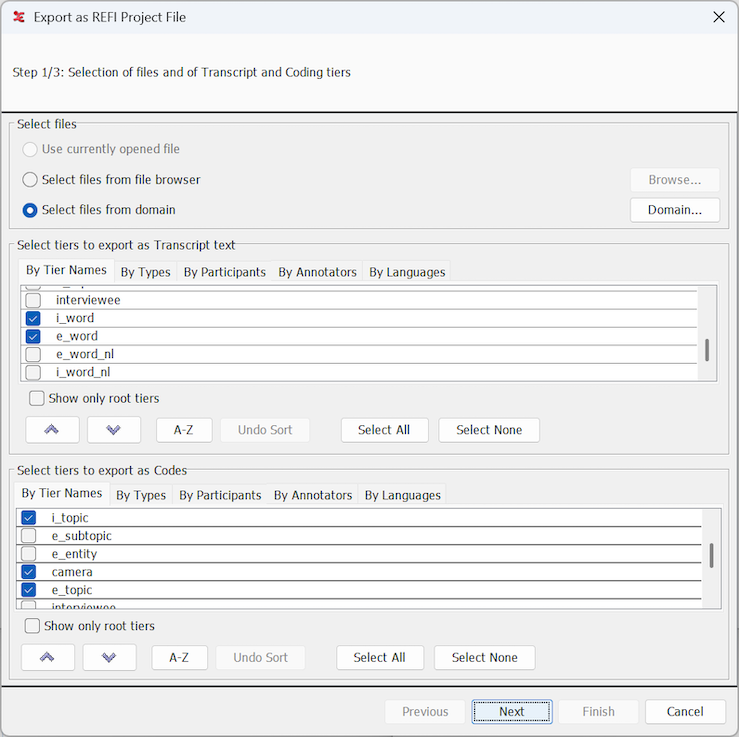
Select
EAF filesfiles from the file browser or from a domain. The files will be loaded and two tables will be filled with the tier names.The first table allows to select the tiers that should be exported as transcription text. If there are multiple speakers (in multiple tiers), these will be exported in a single Transcript text file (i.e. one Transcript text file per
EAF file. More details on this in step 2.The second table allows to select tiers that should be exported as Coding tiers. If a selected tier in this table has an ancestor tier in the Transcript table, it is assumed the annotations on this tier add Codes to annotations on that tier and ultimately to that part of the exported transcription text that originates from that ancestor annotation. If a Coding tier does not have an ancestor tier in the Transcript table, it is assumed the annotations add codes directly to segments of the media file.
In both cases the annotation values are added as
Codesto theCodebookin the output. If a Coding tier is linked to aControlled Vocabulary, all entries of that CV are added to theCodebook, regardless of whether they are used or not.
At least one tier should be selected, in either the Transcript or the Coding tier table, in order to be able to proceed to the next step.
Step 2/3: Transcript configuration and media file handling settings
Figure 177. Export as REFI project file, step 2
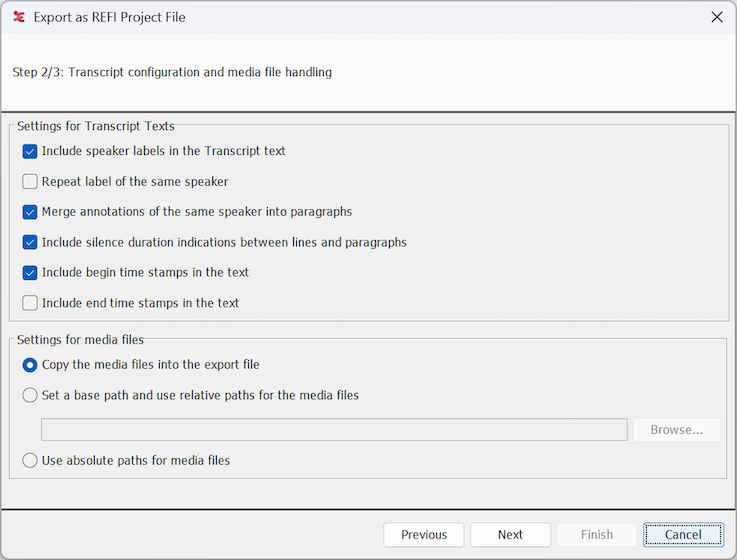
Settings for Transcript texts
Include speaker labels: if this is selected a label based on the participant attribute or the tier name will be printed in front of the text. The label has a fixed maximum length of 3 characters.
Repeat the label of the same speaker: sets whether or not the label should be printed if the speaker of the current utterance is the same as the one of the previous utterance.
Merge annotations of the same speaker into paragraph: if not selected, each annotation will be on a new line in the output. If this options is selected, the annotations of one speaker will be on the same line in the output, separated by a whitespace. Until an utterance of a different speaker appears, this will always be on a new line.
![[Note]](images/note_1855015319.png)
Note A special case are subdivision tiers; if these are selected as transcript tiers, annotations under the same parent will always be merged in the export (separated by whitespaces), regardless of this setting. If a depending tier of a subdivision tier is selected as a coding tier, the resulting code of each depending annotation will still be linked to that part of the transcript text that corresponds to its parent annotation.
Include silence duration indicators: if this is selected an indicattion of the duration of the gap between utterances is printed in the output text, with a (currently hardcoded) minimum of 200 milliseconds. There won't be silence duration indicators within a paragraph.
Include begin (and/or end) time stamps in the text: if selected, a formatted time stamp will be printed at the beginning (or end) of a line or paragraph. Importing QDA applications may or may not show these time stamps in their text view.
Note Regardless of these time stamp settings, there will be
Syncpointelements in the REFI project XML file, ensuring that the time links between segments of the text and the media file are available to and in the importing QDA application.
Settings for media files
Copy the media files into the export file: if this is selected the linked media files are copied into the
Sourcesfolder of the.qdpxfile. In the REFI project's.qdefile, the media files are then referenced withinternal://URL's. The big disadvantage is that this increases the size of the.qdpxfile considerably. Unfortunately, it seems that the best chance of successful import into a QDA application, including the media files and links between text and media, is with this option selected.Note This export function does not check possible maximum sizes of the files to add or of the resulting file.
Set a base path and use relative paths: with this option a base path for the media files should be specified. The base path should be (the path to) a folder containing the media files and/or the sub-folders containing the media files. The media files will not be copied into the
.qdpxfile, in the project's.qdefile they will be referenced withrelative://URL's. Even though this could be sufficient for importing QDA applications to find the media files, if importing takes place on the same computer, this often doesn't work. The QDA application might prompt the user to locate or select the base path folder (this can be a different folder e.g. if importing happens on a different computer).Use absolute paths of the media files: with this option the media files are not included in the
.qdpxfile and are referenced in the project's.qdefile withabsolute://URL's, their current absolute path. When the export from ELAN and the import into a QDA application is performed on the same computer, that could theoretically give a good chance of the media files being found and imported. But the three tested applications did not support this.
It will be a matter of just trying out which option works (best), depending on the target QDA application and possibly the operating system. More information on media file handling and on the structure of a .qde file in general, can be obtained from the www.qdasoftware.org website.
Step 3/3: Saving the file and showing the export progress. A dialog asks to specify a location and enter a name for the
.qdpxfile, after which processing of the.eaffiles starts. After completion of the export process, the.qdpxfile can be imported or opened in a QDA application (possibly after transfer of the file to a different computer). If the export is cancelled before the end of the process, the.qdpxfile may or may not be usable.