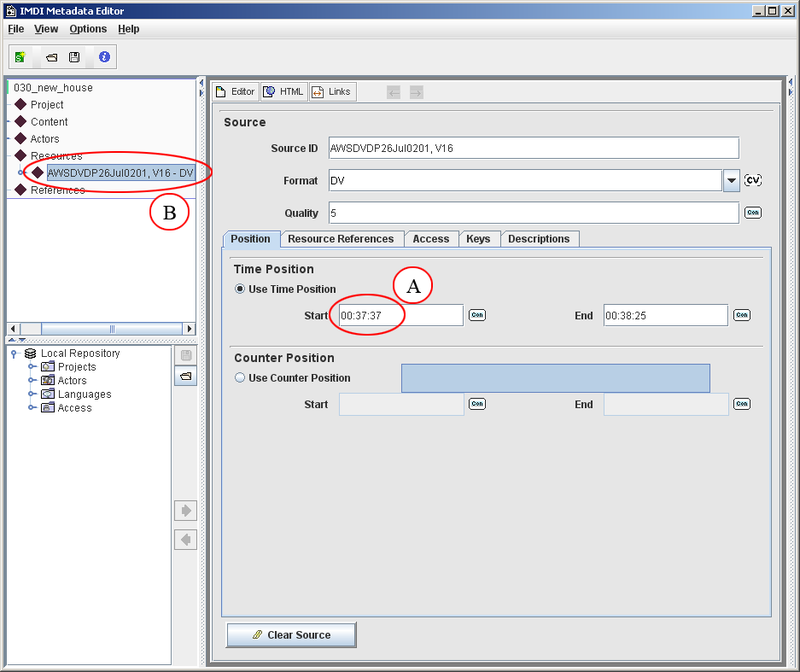
The Resources element is for information regarding resources (media files and annotations); it is also where you put information regarding the source file of the resources, for example reference to a DMF. The source element is used to supply information for the Digi-Team to make the media resource files. This user guide will only focus on the Source element, as that is where you put this information. To open the Source element click on the Sources tab and click on Add to open the metadata fields (Figure 3.9). When you add a source, as with the Actors element, you will initially have a new Unspecified node in the Browse Panel. By populating the Source ID and Format fields the new unspecified node now uses that information (B).
The view of the Content Panel for this new source is divided in two sections, the Source section in the top half and the tabbed section in the lower half. From the tabbed section we are only going to cover the Position and Descriptions element (Figure 3.9).
Source
| Source ID: | This is the label of your source recording, which should be the tape label you gave the recording that was also used as the DMF label. |
| Format: | This is the format of the media you used to make the recording. There are a lot of cryptic initials and format codes in this drop-down selection, but if you place your mouse pointer over one you will get a pop-up giving a more detailed description of the format. Even though this field is unlocked controlled vocabulary, the selection from the drop-down list covers most formats, so free-text should not really be necessary. |
| Quality: | A very simple 1 to 5 grade, 1 being poor and 5 being flawless. |
Position
The Position element is for you to enter the start and end time code information for the segment you want cut from the DMF to obtain the session resource media file.
There are two sections to this tab, Time Position and Counter Position. You use Time Position for this time code information.
| Time Position: | This is where you enter the start and end times for the clip you want. The preferred time code format is HH:MM:SS:mmm (Hours:Minutes:Secods:milliseconds), but you can also use HH:MM:SS:FF (Hours:Minutes:Seconds:Frames) (Figure 3.10) if your software doesn't work with milliseconds. Even if your time code information doesn't go to the detail of milliseconds or frames, you still need to recognize these segments of the time code, so use zeros. Milliseconds use three digits, frames use two. If you intend to use the whole DMF as the media session file you still need to populate the start and end times. Here you would use 00:00:00:000 in the start field and would have to calculate the end time using ELAN, or another program that uses detail greater then just seconds. Please do not use basic media players such as Windows Media Player and QuickTime to obtain time code information. |
| Counter Position: | Do not use this field for media resource file time code information. This field is used for alternate sources, such as page numbers, or non-time code sources in general. |
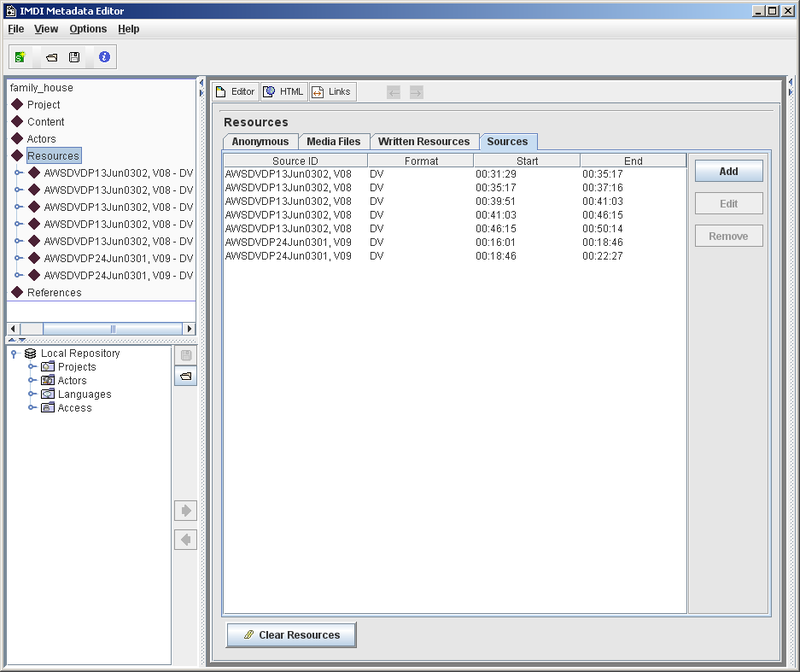
If your complete session involved more than one recording, for example two tapes were required to collect all the information, then you highlight the Resources node and add a new source. This is particularly useful if your DMF file is multiple recordings and you want different sections made into one recording. If you do use multiple files that need to be merged you must clearly note in the Resources Description tab the order the segments have to go in. Figure 3.10 shows a multi DMF Resource element viewed with the Resource node highlighted.
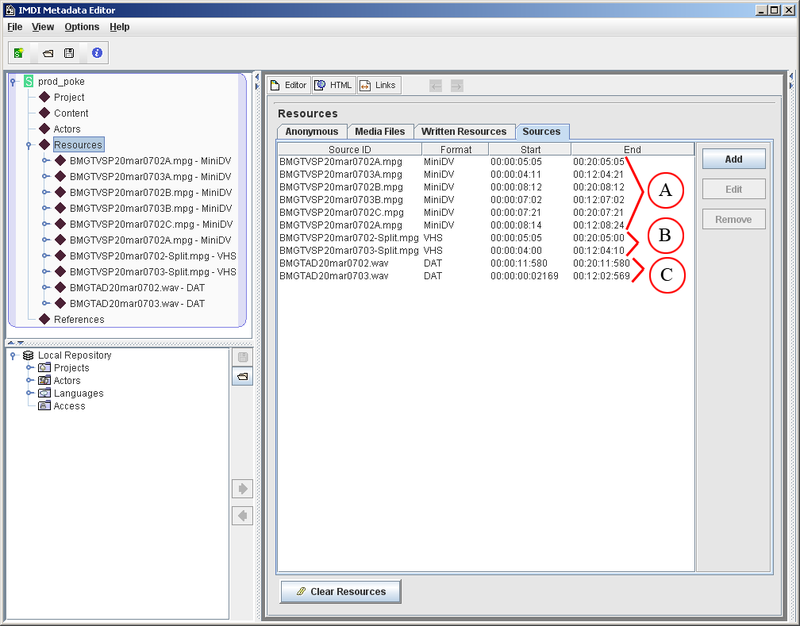
You can also add multiple sources to make multiple media resource files (Figure 3.11). This is quite a complicated recording in that you could find in a gesture lab set-up. In this scenario you have three separate camera angles (Figure 3.11 A), a split-screen of the three separate angles (Figure 3.11 B) and an audio back up recording (Figure 3.11 C). On top of that, there is two of each recording that need to be merged.
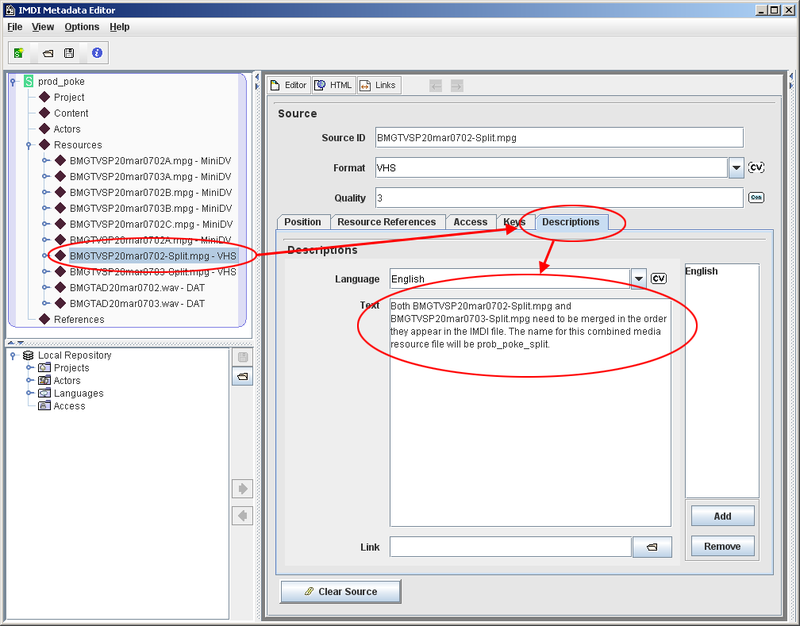
In this scenario you would need to use the Details elements of each source to supply information on how you would like this session to be made. Also, as an IMDI file only uses one name to make all the output media resource files, you would also need to supply information on how you need the files named (Figure 3.12).
For extra detail on completing the Resource elements, please contact the Digi-Team (dobesarc@mpi.nl).