The Actors element is where you record information on the subjects that were part of this session. For each Actor the first thing you need to do is add the actor. Click the button in the upper right corner of the Control Panel. This will open the Actor Element (Figure 3.5). The Actor element is the most complex and detailed one you have to complete. It is also the one where you have to exercise the most caution about the information you include.
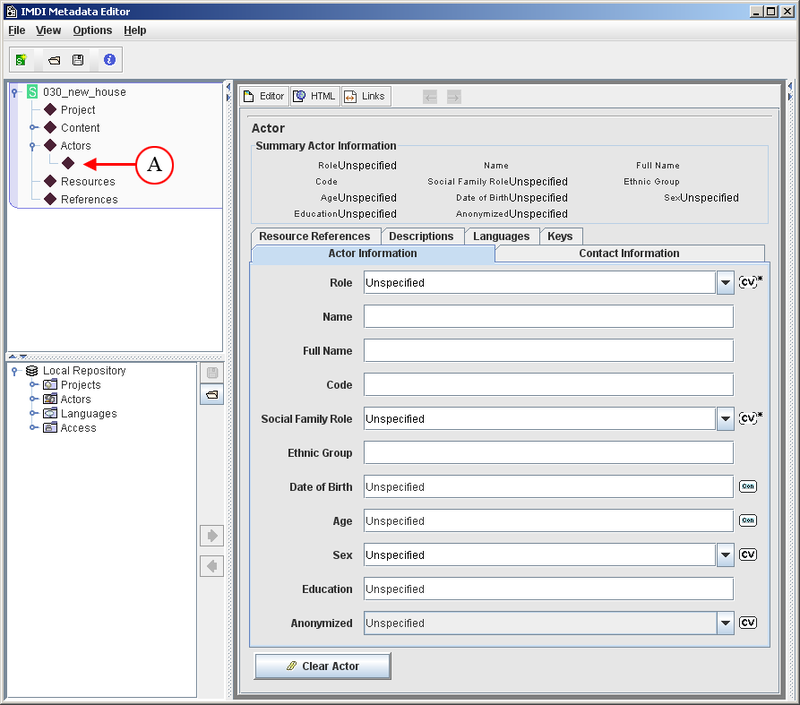
After adding an Actor, you will notice that in the Browse Panel you have a new node under the Actors node (Figure 3.5 A). This is just for one actor, and the view in the Content Panel relates only to this individual actor.
In the Content Panel there are six sub elements: Actor Information, Contact Information and Descriptions, Keys, Languages and Resource References. Please refer to the Reference Manual for information regarding the Keys and Resource References.
| Actor Information: | This is where you describe the role of the actor. Bearing in mind that actor is a generic term for anyone involved in the session, so it also includes researchers, recorders, teachers, students, etc. |
| Contact Information: | This is the contact information for the actor, not necessarily actor’s details, but those of the contact. |
| Languages: | This is where you list all the languages the actor uses. As this information is regarding the actor generically, and not just unique to this session, then add all the languages, and not just the ones used in this recording. |
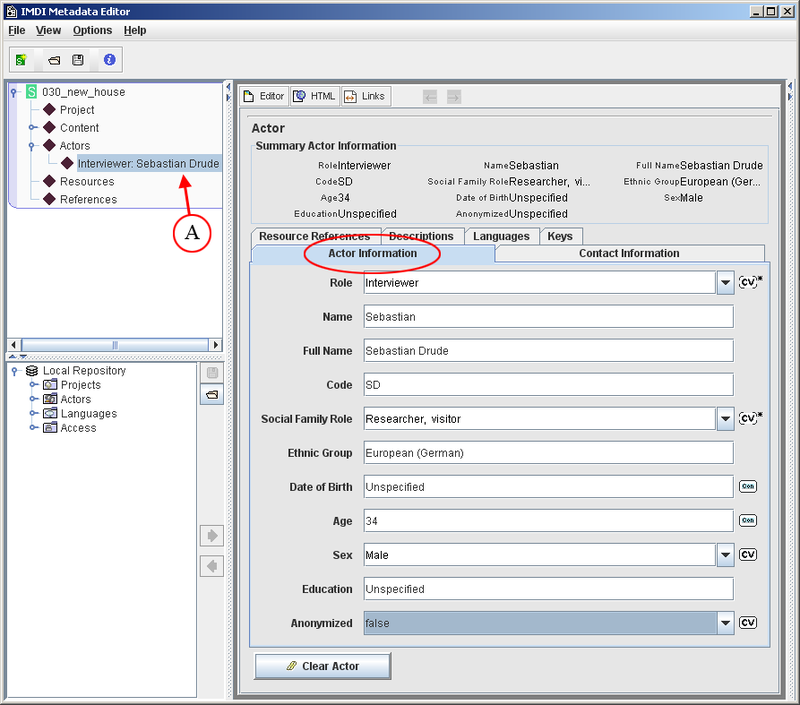
When you populate the Actor Information element the new node in the Browse Panel now shows the Role and Full Name information (See Figure 3.6 A).
Once you have your actor information you will need to add their language(s) (Figure 3.7). There are two sub elements to Languages: Languages and Language Descriptions. Languages is where you list the languages of the Actor. Since one Actor can have more than one Language, you need to Add a language first before you can start populating the Language elements with data.
You can select the Name of the language from the controlled vocabulary. When you do so, the ID field will be automatically filled. When the Actor Language is not in the cv list, than you may fill the Language Name yourself. Is this case the ID field will not automatically be filled.

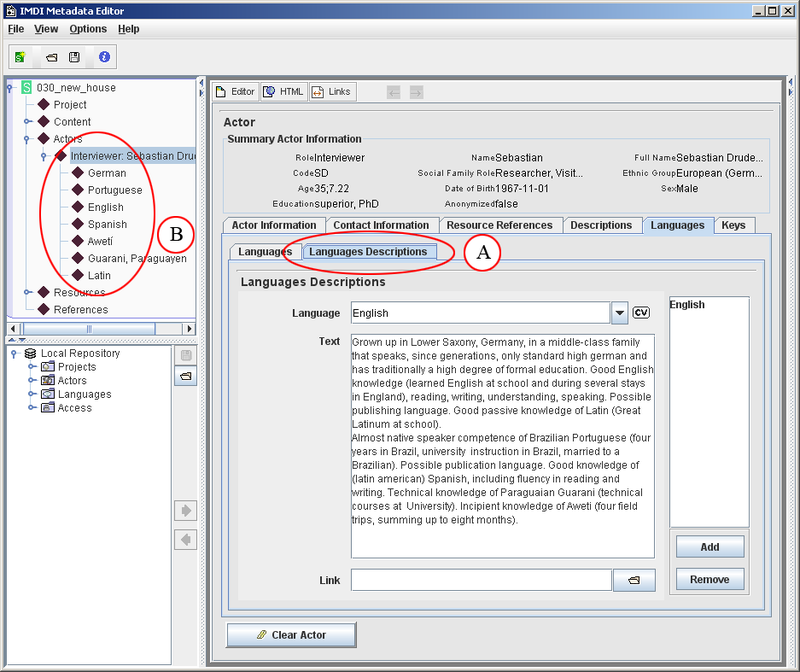
Figure 3.8 shows an actor’s completed Language element viewed from their Language Descriptions tab (A). Remember, this Language Description describes the actor's languages as a whole.
To add another actor go back to the main Actors element and go through the same process.
![[Note]](images/note.png) | Note |
|---|---|
A brief note regarding Actor information: As has previously been mentioned, all archived metadata is open to web searches. Since the Actors node contains fields where you may name your subjects, you need to be 100% sure that it is OK for their names to be public. Otherwise you should leave these fields blank or encoded. Please be aware that the Code and Anonymized options do not currently protect the identity of the actor. |