In some cases you might want to have more information about annotation overlaps and their respective duration. There are two methods to detect overlaps. The first creates annotations from overlaps (see Section 2.14.1) and the second specifically aimed at comparing annotators (see Section 2.14.2).
Creating annotations from overlaps uses a wizard that has been developed to automatically detect annotation overlaps and optionally adds the length of the overlaps to the newly created annotations. This function can be started from . This will open the Create Annotations From Overlaps window that is based on 4 steps.
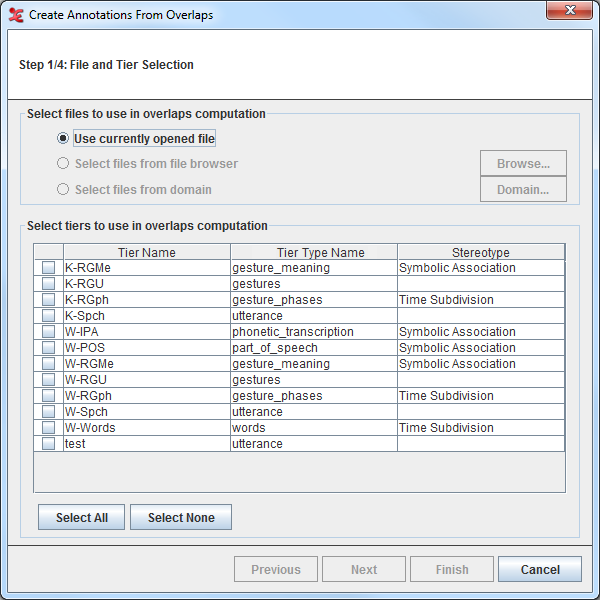
Step 1/4: File and Tier Selection
Select the tiers to use in the overlaps computation. You can select all the tiers displayed in the list if you click on , or deselect them if you click on . Once you have made your choice for the tiers for which the overlaps should be found, you can select next, this will bring you to the next step.
![[Note]](images/note.png)
Note At least two tiers has to be selected in order to reach the second step.
To check the option or , see Section 1.9.2.4
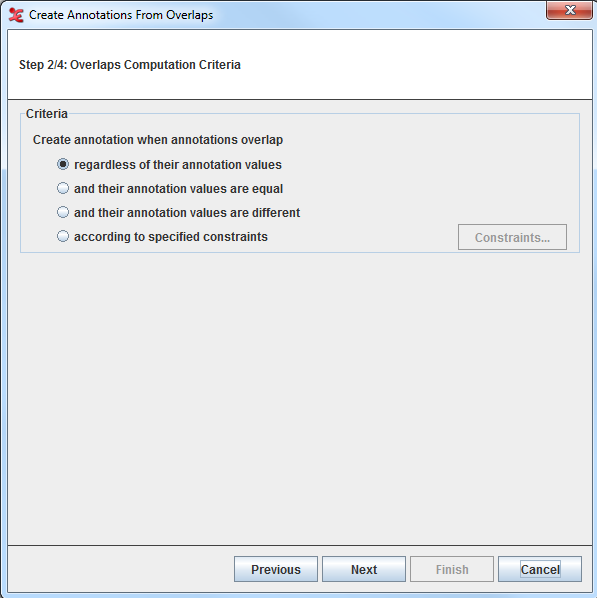
Step 2/4: Overlaps Computation Criteria
In this step you can define the overlaps computation criteria in the Overlaps Computation Criteria window
You can choose within 4:If this option is selected, all the possible overlaps will be computed.
If this option is selected, only the overlaps with the very same annotation values will be computed.
If this option is selected, only the overlaps with different annotation values will be computed.
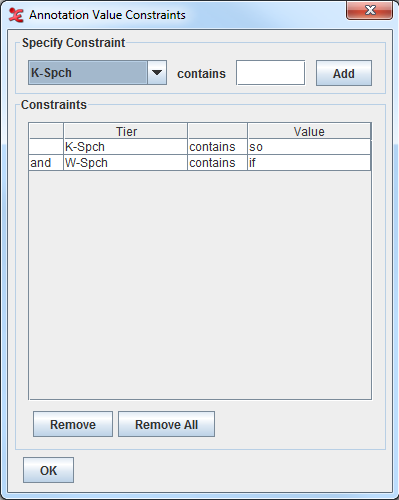
Select this option and click on the Annotation Value Constraints dialogue window will be displayed:
Here you can specify for which tiers you want the constraints to be applied by selecting the tiers from the drop down list and inserting the value they should contains. Then click : the constraints table will display the tiers you have selected together with the value they have to contain. Once you have made your selections, you can click to go back to the Overlaps Computation Criteria window and click to go to the third step.
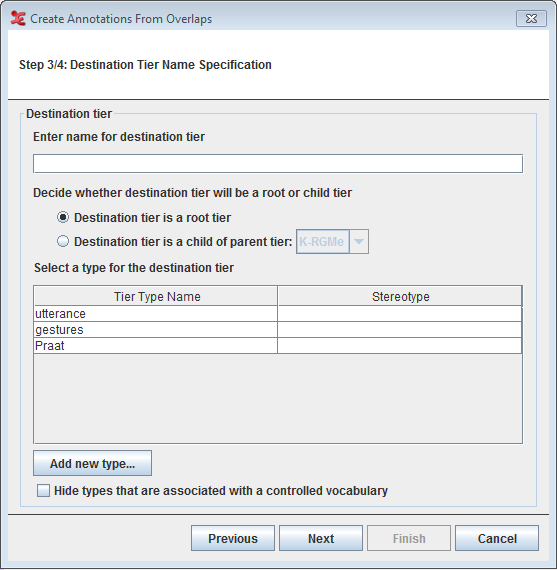
Step 3/4: Destination Tier Name Specification
In order to create the annotation from overlaps, you have to define its destination tier. You first enter the name for the destination tier, and then select if you want it to be either a root tier, or a child of a parent tier. In the former case, you can select the Tier Type Name and Stereotype for the destination tier from the table. In the latter case, specify from the drop down list which tier you want to be the parent tier. In both cases, if there is no correct tier type available, you can create a new one which matches the destination tier by clicking the button. You can now go to the next and last step, by selecting .
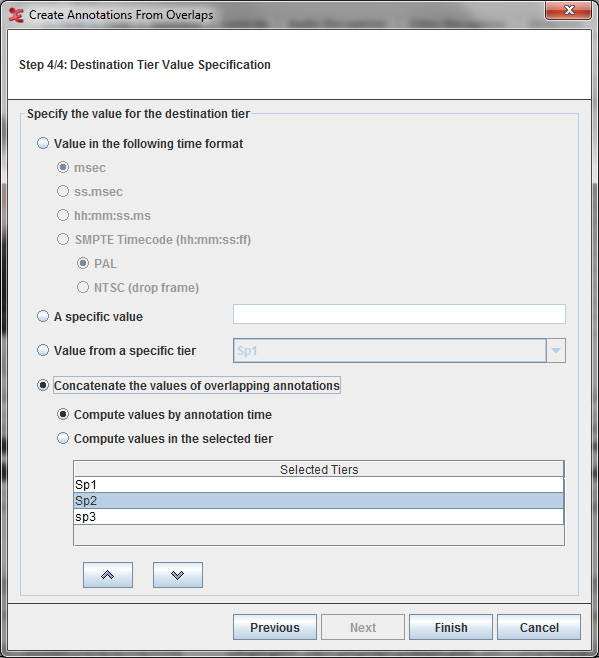
Step 4/4: Destination Tier Value Specification
Here you can specify the value for the destination tier.
You have four options:
Specify the value for the destination tier. If selected, created annotations will be filled with the overlap duration. You can choose one of the following time format:Msec
ss.msec
hh:mm:ss.ms
SMPTE Time code hh:mm:ss:ff (either PAL or NTSC drop frame)
A specific valueIf selected, you can enter the value for all annotations that are created.Value from a specific tier. Here you can specify the tier (you can select it from the drop down list) whose annotation values will be used for the created annotations.Concatenate the values of overlapping annotations. If selected, created annotations will be filled with the concatenated values of the overlapping annotationsCompute values by annotation timeIf selected, the values of the annotations are concatenated based on the begintime of the annotation.Compute values from the tier in the selected orderIf selected, the values of the annotations are concatenated based on the selected tier order. The tiers can be moved up and down within the list using the buttons below the list.
Finally, you can click on . The new tier will be created and populated.