When granting access rights to a part of the corpus you obviously need to point out to whom these rights should be given. Unless you intend to open resources for the whole world it will be necessary to appoint a user or a group of users that should receive the access rights. This chapter describes how to create and modify users and groups.
![[Note]](images/note.png) | Note |
|---|---|
In order to create or edit a user, or a group of users, you need to have the role of Archive Manager, Domain Curator or Domain manager. |
To create a new user click in the AMS menu bar. A new page will appear as shown in Figure 2.1.
The first step is to fill in the required fields in the User Data section. Choose an appropriate Hosting Institution for the new user. The 'UID Domain' field is changed accordingly. Enter a unique user name in the 'User Name' (UID) field.
| Note |
|---|---|
If the chosen Hosting Institution is NOT the default (in the example in Figure 2.1 the default is MPI for Psycholinguistics) the username to be used when logging in is User Name + @ + UID Domain. In our example that would be John Doe@mpi.nl (if MPI for Psycholinguistics were not the default). |
In the 'Archive-wide Roles' field (last field of the section) you can decide if the
new user should become an Archive Manager by ticking the checkbox (remember that you can
do this only if you are an Archive Manager yourself). Save the user data by clicking on
the Save button at the left bottom corner of the page. The creation of the new account
will be confirmed with a message like User "John Doe" has been
saved.
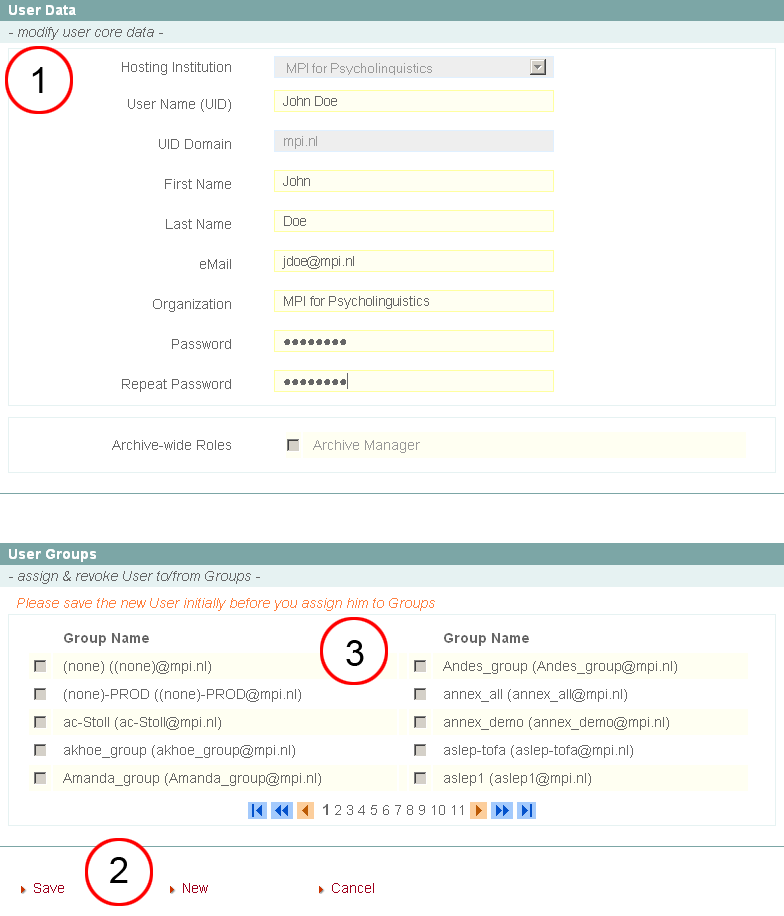
Figure 2.1. Creating a new user
To create a new user first enter the user data (1), then click on Save (2) and finally select the groups you want the user to be added to (3) and click on Save again.
The second - optional - step is to add the newly created user to a group. In the User Groups section you will find a list of all the existing groups. All the groups to which the user belongs will be listed first. If you want the new user to be added to one of them, tick the checkbox next to it and confirm by clicking on 'Save'. Note that if you have not yet saved the 'User Data' information, the chechboxes cannot be ticked.
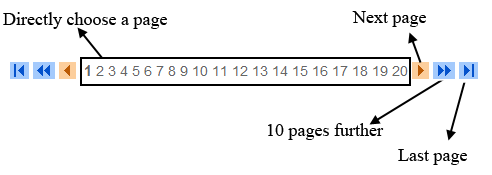
If the group to which the new user has to be added is not currently displayed, navigate through the group enumeration as shown in Figure 2.2. Alternatively, you can enter a string in the textfield in the lower right corner of the page and click Filter groups. As a result, the list is reduced to only those groups whose names (partially) match the string in the textfield.
To create another user click on New (to the right of 'Save') and go through the same steps as described in Section 2.1.1 and Section 2.1.2.