Before creating and editing rules, we first take a look at how existing rules are displayed in AMS.
As we saw in Section 1.2 you start AMS by selecting a node in ASV and clicking in the context menu. The page that now appears contains the Node Authorization Overview. If you are working in a different part of AMS, this overview can also be displayed by clicking in the AMS menu.
The Node Authorization Overview shows the rules of all the nodes in the path from the
selected node to the top node of the corpus tree in a bottom-up fashion. In the example
shown in Figure 3.4, only the
active node - LAMS Demo - contains rules: one for the user (marked by the icon ![]() )John Doe and one for the group (
)John Doe and one for the group (![]() ) John Doe's research group. If you let your
mouse cursor hover over a user or group icon, some details for these items will be
displayed, namely ID, Name, eMail and Organization in case of a user; ID,
Name, and Members, in
case of a group. For both the user and the group the existing rules are displayed in a
bullet point list on the right of their names.
) John Doe's research group. If you let your
mouse cursor hover over a user or group icon, some details for these items will be
displayed, namely ID, Name, eMail and Organization in case of a user; ID,
Name, and Members, in
case of a group. For both the user and the group the existing rules are displayed in a
bullet point list on the right of their names.
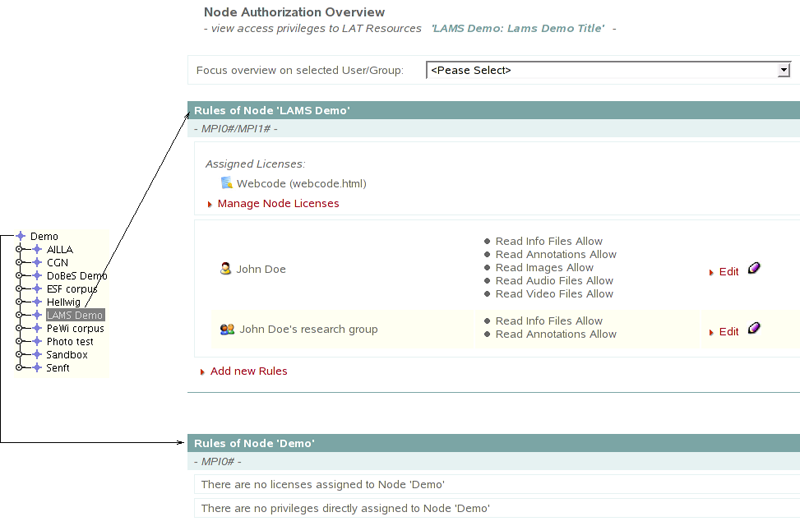
Besides the access rules, Figure 3.4 also shows that a license, called 'Webcode', has been linked to node 'LAMS Demo'. More about licenses can be found in Section 3.4.