The Browse panel allows you to browse through one (or more) IMDI (Session, Lexicon or Corpus) files. It displays all currently open IMDI files, e.g.:
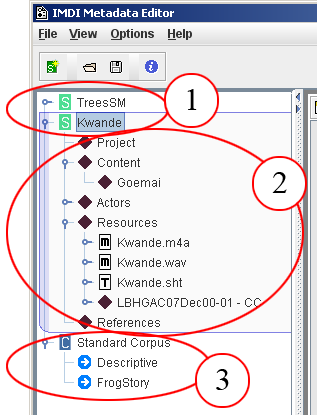
Figure 1.31. Browse panel
IMDI Session files (with the currently active node highlighted in blue)
Internal structure of an IMDI Session file
IMDI Corpus file and its internal structure
The Browse panel makes use of the following icons:


Under each session or corpus node, the structure of the corresponding IMDI (Session, Lexicon or Corpus) file is displayed in the form of metadata nodes, media files nodes, written resource file nodes, lexicon file nodes and/or corpus link nodes.
The nodes of the Browse panel interact in the following ways with the screens of the Content panel (see Section 1.5):
Click on any node in the Browse panel to make the corresponding IMDI file the currently active IMDI file. It will be highlighted in blue color, and its metadata information will be displayed in the Content panel, e.g.:
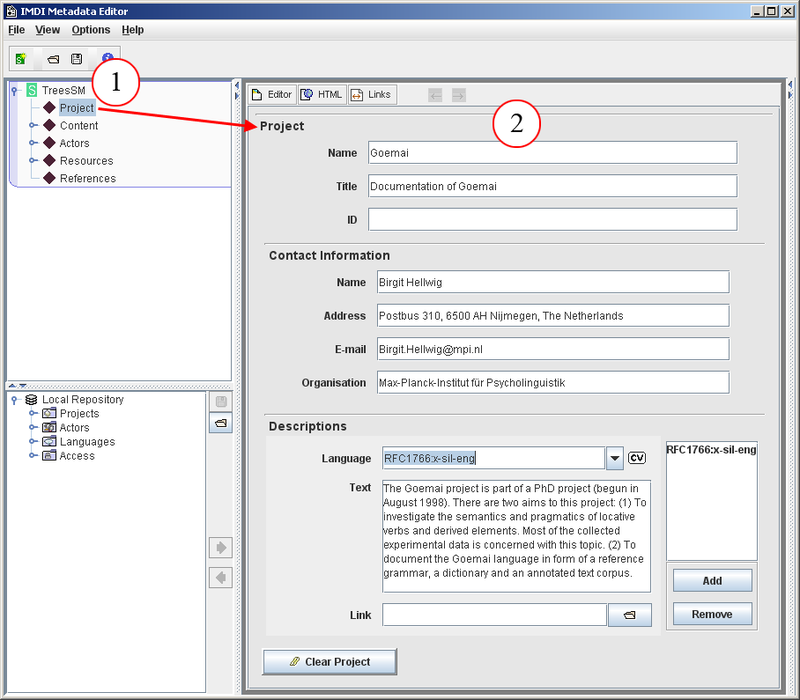
Figure 1.32. Open a node
Browse panel: Project node of the file
TreesSM.imdiContent panel: Project screen (of the file
TreesSM.imdi)
Some nodes in the Browse panel allow you to add further sub-nodes, which are then displayed as screens in the Content panel. For example, the node Actors allows you to add a sub-node for each actor. To add a sub-node, do one of the following:
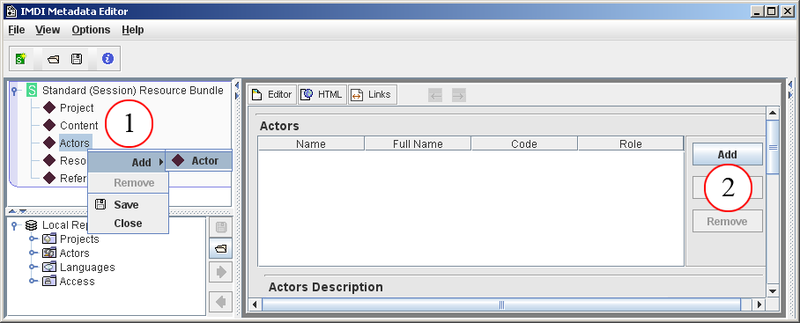
Figure 1.33. Add subnodes (1)
Click with the right-mouse button on a node. A pull-down menu appears. Select from the pull-down menu.
Alternatively, click on the button in the Content panel.

Figure 1.34. Add subnodes (2)
The added subnode is displayed in the Browse panel and metadata of the new subnode is displayed in the Content panel.
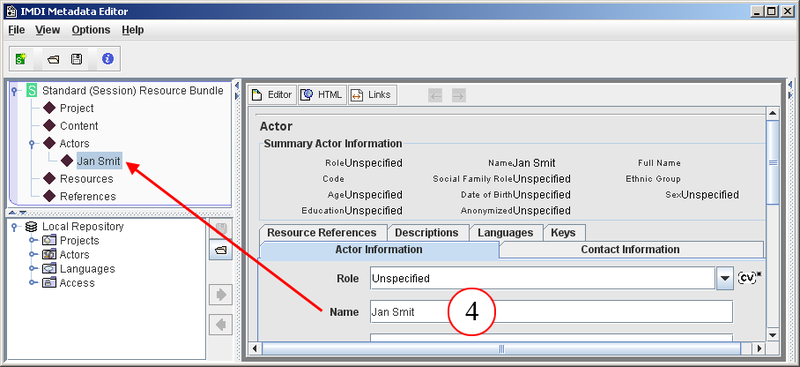
Figure 1.35. Add subnodes (3)
When a name is entered in the Name field, it is also displayed as the name of the new subnode in the Browse panel.
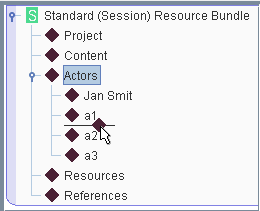
You can insert the new sub-node anywhere under an appropriate top node. To select its position, do one of the following:
Add the sub-node (see above), and click on it in the Browse panel, keep the mouse button clicked and drag it to its new position. A line will appear at this position. Release the mouse button, and the sub-node will be inserted in its new position, e.g.:
Alternatively, do the following:
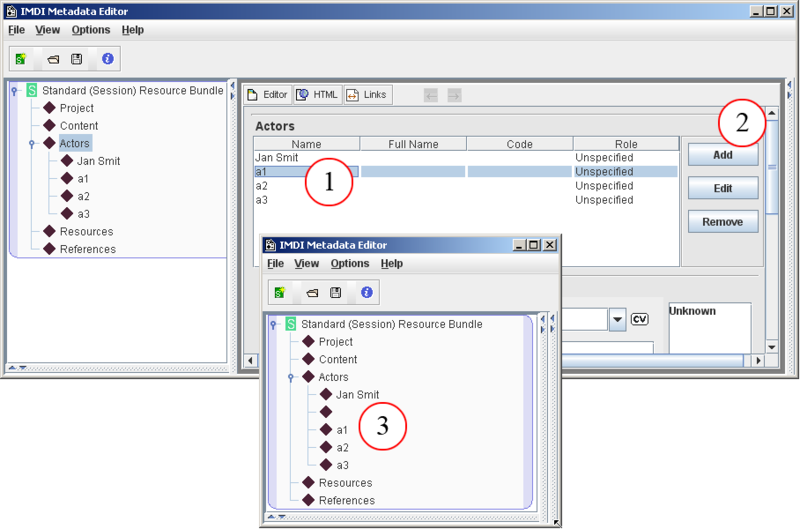
Figure 1.37. Add a subnode in Content panel
In the Content panel, click on the subnode before which you want to insert the new subnode. It is highlighted in blue.
Click on .
The new subnode is added before the selected subnode.
![[Note]](images/note.png)
Note The IMDI Editor makes use of different buttons for different purposes, and not all of them add new sub-nodes. This function is only available for those nodes that allow for the three options , , and .
Added sub-nodes can be removed again. Do one of the following:
In the Browse panel, click on the sub-node that you want to remove. It will be highlighted in blue color. Then click with the right-mouse button on the highlighted node. A pull-down menu will appear. Select from the pull-down menu.
Alternatively, in the Content panel, click on the sub-node that you want to remove. Then click on the button.
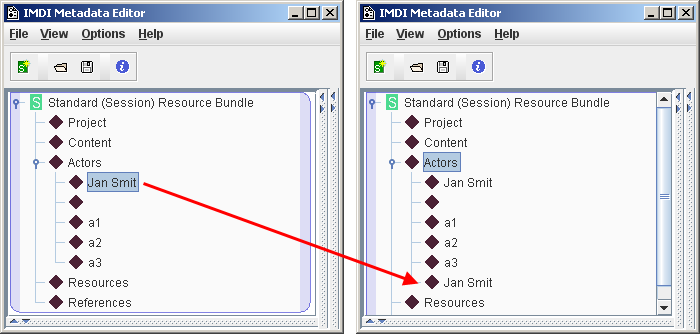
Copying a node
The information of an existing node can be copied to a new node with drag and drop. Do the following:
Click on a node in the Browse panel
Hold down the left mouse button and drag the node a bit
Now hold the CTRL key (make sure you already dragged the node a bit)
Move the node to a parent node
Release the left mouse button