Each source (e.g., video or audio tapes, or books) associated with the session has to be listed on the Sources screen. To add a source (see also Section 1.3), do the following:
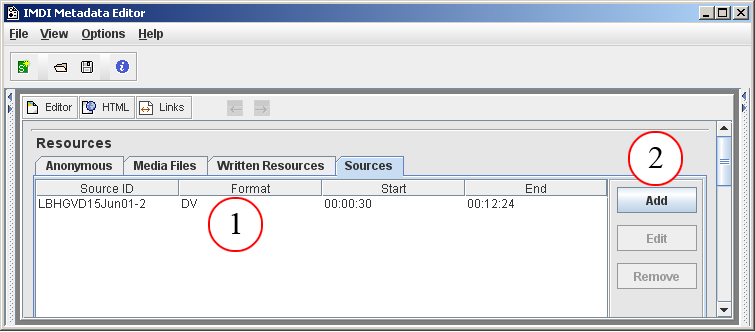
Figure 2.36. Add a source
The list of sources
Click on to add another source. To edit or remove a source, click on the source to highlight it, then click on or
The and buttons give you access to the Source screen that contains the following kind of information:
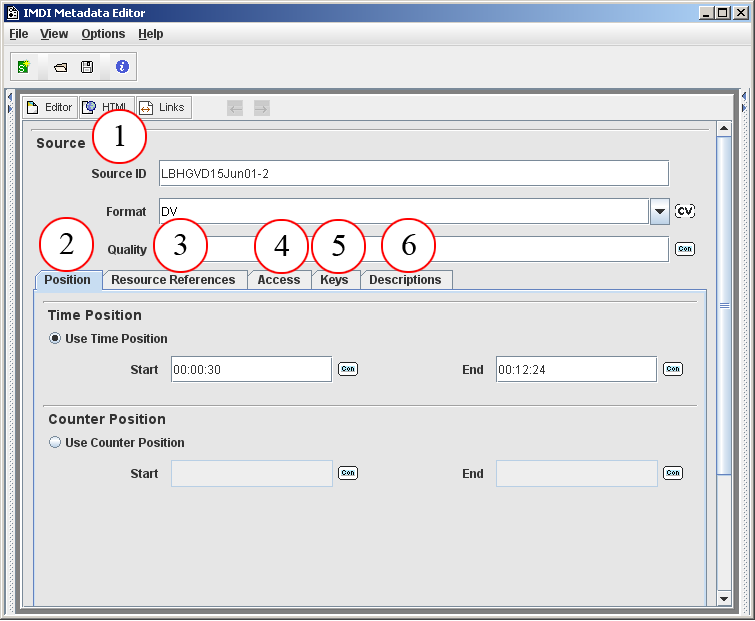
Figure 2.37. Add and edit a source
Source screen (see Section 2.5.4.1)
Position (see Section 2.5.4.2)
Resource Reference (see Section 2.5.4.3)
Access (see Section 2.5.4.4)
Keys (see Section 2.5.4.5)
Descriptions (see Section 2.5.4.6)
This screen contains general information about the source, i.e.:
Source ID
A short code to identify the source.
![[Note]](images/note.png)
Note Note for researchers working at the MPI for Psycholinguistics, Nijmegen: Please consult the tape labeling conventions.
Format
The physical storage format of the source. Choose a value from the pull-down menu, or type in an alternative value.
value comments Compact Cassette (i.e., normal audio cassette) Compact Disc Compact Disc - Read-Only Memory Digital Audio Tape Mini Disc Reel-to-reel tape Digital Video Disc Digital Video Disc - Read-Only Memory Hi8 Video Tape VHS Video Tape Digital Video U-matic Tape A publication on paper A film card Quality
The quality of the tape. Choose an option from the pull-down menu (1 stands for low and 5 for high quality).
The start/end position of the session in the corresponding source. Please enter this position in the following formats:
In the case of digital audio tapes use the field Time Position: enter hh:mm:ss (i.e., hours:minutes:seconds).
In the case of digital video tapes use the field Time Position: enter hh:mm:ss:f (i.e., hours:minutes:seconds:frames).
In the case of non-digital tapes and books, use the field Counter Position: enter a sequence of digits to represent the counter position (of a tape) or the page numbers (of a book).
| Note |
|---|---|
Note for researchers working at the MPI for Psycholinguistics, Nijmegen: If you have asked the digitization team to digitize your tape, the team will create a digital master file (DMF) from it. You then need to go through this DMF (using either Windows Media Player or ELAN) to identify the relevant session: enter the start and end position of this session (as it appears on this DMF) under Position. The digitization team will then segment the DMF further according to these specifications, and create the appropriate media file. |
The IMDI Editor automatically assigns a unique resource identifier to each media file and written resource (see Section 2.5). The sub-screen Resource References lists all available resource identifiers: it displays the identifier together with the type of resource (e.g., 'N10155 (Media File)' in the screenshot below), and it displays an empty box to the left.
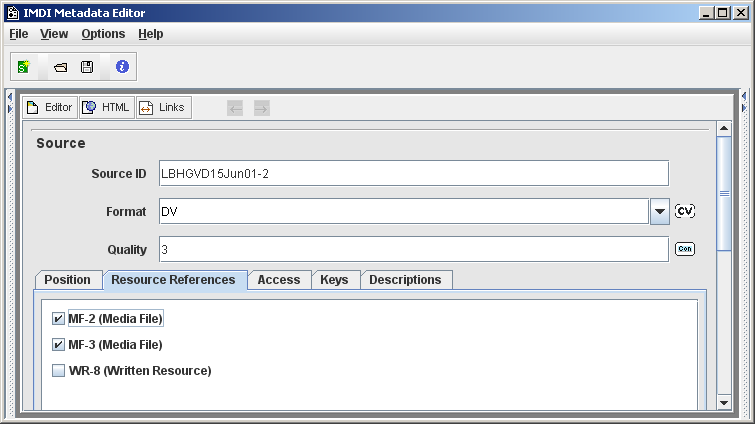
The sub-screen Resource References now allows you to link the source to a specific media file or written resource. E.g., a source may only be connected to the media files (e.g., 'N10155 (Media File)' and 'N10198 (Media File)'), but not to a written resource. To link a resource, click into the empty box to its left. A checkmark will appear there.
Information about the access rights to the source. See Section A.3 for instructions on how to fill in an Access schema.
Keywords that are relevant to the source. See Section A.2 for instructions on how to fill in a Keys schema.
A description of the source. See Section A.1 for instructions on how to fill in a Descriptions schema. Remember: The field Language refers to the language in which the description is written - not to the language under investigation.